Monday, 15 July 2013

An Indian Wedding Card

G'day to you. I hope you enjoyed your weekend and are feeling refreshed and ready for the coming week. I have a card to share with you today which is a rather rushed commission that I received on Saturday 13th July (just gone) for this coming Saturday 20th July. It also had another little twist in as much it is for an Indian wedding. Thank goodness for Google!
The first thing I did was check out Indian Wedding Cards, most are produced commercially but at least it gave me an idea. Next I knew Ganesha was the deity that I needed understand more about and explore further. When I researched I found it was OK to include an image as Lord Ganesh, whilst having his own celebrations, is revered at most Indian celebrations and festivities.

So here's my card:


I decided on a Gatefold style of card. The colours red and gold are very popular with wedding cards (my research told me) so I used Kaisercraft Scarlet weave cardstock as my base. I used gold strips (peel offs) for the edges.
The swirls are from Fabscraps (organic twirl) and are chipboard that I used my Art Institute Glitter system to cover in Gold.
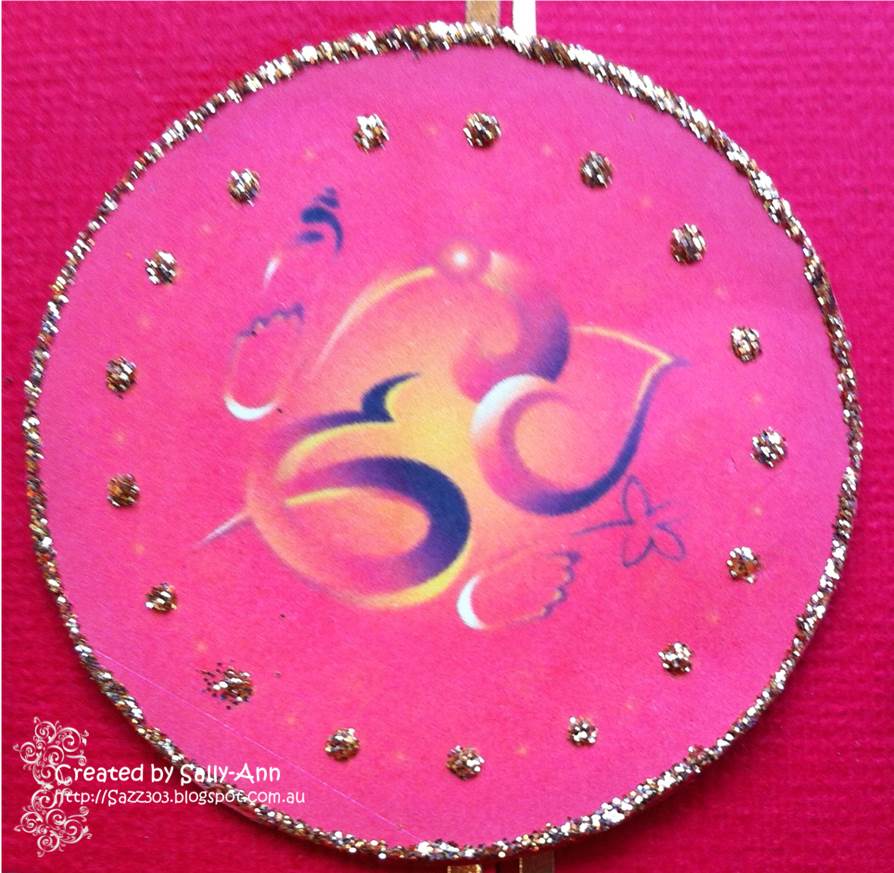


I found this lovely image on Google. Enough of a reference without causing offence as I am not knowledgeable enough to know if certain colours are appropriate and I wanted this reference to be fairly discreet.

The other reason I placed this here is that it held (disguised) my magnet mechanism (Basic Grey Magnets) that holds the card closed.

Again I used my glitter around the edge and on the inside of the circle.

The colour in this photo looks a bit pink, however the colours do match my papers very well.


When you open the card this is what you see. I purchased the two people from Dreamstime - they are an stock photography/ image company. This particular image was the best of what I could find for my needs. I manipulated it a little in a graphics program so that they were looking across at each other.


Here is the image of "The Bride". I fussy cut her out and used a gold spica gel pen on her clothing and necklace.
I used the Spellbinders Radiant Rectangles S5-161 on some holographic gold card I had in my stash then placed her with some foam pads on top to add some dimension.


I treated "The Groom" in the same way as the bride and placed them on the outside folds  of the Gate fold card.


For the centre panel I created a sentiment on my PC then cut a panel in Gold Mirri card from Spellbinders 5 x 7 Enchanted Labels 28. I traced around the inside of the die on my sentiment, fussy cut this out and then matted it onto the Mirri card with foam dimensional pads.


The two little hearts I bought from My2Angels ages ago and I popped them on the sides of the central panel.


Here is the reverse of the card opened out so you can see the folded flaps.


This little charm is so adorable on the reverse it says "Home Sweet Home", I just thought it fitted so I added it to the back of the card as a little finishing touch.


Here are the main ingredients for this card:

Sunday, 14 July 2013

Cards from Fabulous Fashion

Hello my Blog family and Friends. I do hope you are well and are enjoying your weekend.
Yesterday, Saturday 13th July, we had another Made in Dorrigo Day. This is a quarterly opportunity for our small town to exhibit and sell items, made, grown, manufactured or produced within our catchment area. You will have seen previous posts where I have shown photos of my stall. It is where I can showcase some of my cards and whilst I don't make a profit it does help me to cover the costs of my hobby.

Today I have a video clip to show you. I will show some of the cards I made and included on my stall. I was so lucky to be sent a wonderful gift from my sister Clare.


This is it. It is a Double CD from Katy Sue Designs. It is wonderful; containing lots of images, templates and papers to get creative with. I had such fun making these cards with such great results.


Here is the video I promised:


Whilst there were some of the templates used from the CD-Rom, I also used a variety of other ingredients, some of which I list below:


Thank you for stopping by and viewing my post today


Wednesday, 10 July 2013

A Wedding card with a story

Hello to all my Blog friends and family, I hope you are well. Isn't it amazing how some thoughts and sayings trigger off so many memories. I was going to write ... "I cannot believe how time has flown" ... and I thought gosh that reminds me of what my Grandmother used to say. Then as I considered this all these memories invaded my brain of when we were children, my sisters and I, and how we used to love visiting her at her home in Streatham in London. Then I couldn't resist and I googled her address and even more memories triggered through.
Today's card is one that was commissioned by a Grandmother, Helen. It is a card with a story; and I am sure the story will be a great memory for the recipients. The brief I was given was that Helen's Grandson does not want any gifts for their Wedding, so she wanted a nice card that she could send them.  She wanted the card to show how her Grandson proposed to his (now) fiance on the slopes of Japan whilst skiing. When she asked me I have to say my brain went  ... uh oh how will that work out. Well the card I am showing you today is what I came up with. Hope you like it.


This is the card.
I used a variety of stamps to create a background. I found myself thinking back to times when I had skied and imaging the surrounding views.

I used my fabulous Hero Art stamps to create part of the background and the two characters are from La La Land Digi stamps. I had to adapt these to skiers as opposed to snow boarders. Google images helped me out with the ski's.

I embossed some ski tracks with white embossing powder using an old stamp I had in my stash.

The border was made using an EK Success punch and distressed with Pine needles distressed stain.


I used a Kaiser unmounted acrylic stamp "treasure THESE memories" and broken china distressed ink.


I coloured this little chap with my Copics, and found a little diamond engagement ring in a heart shaped red box and some blue ski's to add to him. I hand cut the ski poles and glued those by his arm as well.


... and here is the lucky girl. Also coloured using my Copics, again ski's and poles courtesy of Google images.


Inside the card I kept it quite simple, adding a piece of Design Paper from Prima Sunrise and Sunset A4 Design Paper Pad.

I distressed the edges with Vintage Photo distressed ink pad and added some green ribbon and cream cotton lace (closer detail below). Then added a rub-on and peel offs.


Close up of the ribbon and lovely broderais anglais cotton lace.


The main ingredients I used to make this card:


Thanks for stopping by to read my blog today

Related Posts Plugin for WordPress, Blogger...