
Hello my blogging friends and family. I hope you have had a great Christmas and that when the new year rolls in your NYE celebrations are Super, Safe and Spectacular! I also hope that 2014 also brings you all the things you wish for.
We had a quiet Christmas with friends and on New Years Day the family arrive for a few days which will be wonderful. My second new knee (Surgery 4th December) has just started to get with the program. It has been a painful journey and so different from the first. However I can see the light at the end of the tunnel and it is beginning to feel so much better. Thank you to all my well wishers for a full recovery and recuperation.
Today I have a few more Christmas cards to show you.
Here they are:

This first one I think is just so cute. Made using the Stampin' Up Owl punch and Kaisercraft Base Coat Design Papers.
The sentiment was made using JustRite Christmas Antique Labels One Stamps and matching Custom Die with memento Bamboo leaves ink pad and Copic pen.

A la-La Land Christmas Elf Digi stamp sits at the centre of this card. Behind the image I used a Spellbinders Heirloom die as well as a Swiss Dots embossing folder. The paper is from a Bo Bunny Mistletoe Collection 6 x 6 paper pad and the merry Christmas sentiment is from a sizzix decorative strip die.

Similar to the card above but on different background paper.

Yes, you've guessed it another La La Land Digi stamp, with a Flourishes stamp coloured in Copics as are all the Digi stamps!
The Ribbon is from Really Reasonable Ribbon.

A simple card using a couple of Christmas dies (see links below in the ingredients list).
I used some foil design paper bought at Spotlight and cut out the oval using the Grand Ovals dies.
The design paper is from a Kaisercraft Christmas 6.5" x 6.5" paper pad.

Couldn't not show you a pop-up card. I saw this lovely idea on Pinterest and thought I'd have a go at replicating it. Here is the front of the card.
I used Sizzix embossing folder, as well as a Sizzix, Karen Burniston designed Noel Pop-up insert.

Here is the inside of the pop-up card. Using a Sizzix decorative strip die and a Spellbinders Fleur de Lis die.

Here is one of two cards that are pretty similar. White card base, Kraft card for the background, a Spellbinders Edgeability die, a spellbinders pinking die and the Hero Arts and Sizzix Reindeer stamp and Die set.

... and here is the (almost) twin version of the same design.
... and there you have it 8 more Christmas cards. Here are the main ingredients I used to make these cards.
Thanks for stopping by today. Hope you have a Fantastic New Year Celebration and a very special 2014.

We had a quiet Christmas with friends and on New Years Day the family arrive for a few days which will be wonderful. My second new knee (Surgery 4th December) has just started to get with the program. It has been a painful journey and so different from the first. However I can see the light at the end of the tunnel and it is beginning to feel so much better. Thank you to all my well wishers for a full recovery and recuperation.
Today I have a few more Christmas cards to show you.
Here they are:

This first one I think is just so cute. Made using the Stampin' Up Owl punch and Kaisercraft Base Coat Design Papers.
The sentiment was made using JustRite Christmas Antique Labels One Stamps and matching Custom Die with memento Bamboo leaves ink pad and Copic pen.

A la-La Land Christmas Elf Digi stamp sits at the centre of this card. Behind the image I used a Spellbinders Heirloom die as well as a Swiss Dots embossing folder. The paper is from a Bo Bunny Mistletoe Collection 6 x 6 paper pad and the merry Christmas sentiment is from a sizzix decorative strip die.

Similar to the card above but on different background paper.

Yes, you've guessed it another La La Land Digi stamp, with a Flourishes stamp coloured in Copics as are all the Digi stamps!
The Ribbon is from Really Reasonable Ribbon.

A simple card using a couple of Christmas dies (see links below in the ingredients list).
I used some foil design paper bought at Spotlight and cut out the oval using the Grand Ovals dies.
The design paper is from a Kaisercraft Christmas 6.5" x 6.5" paper pad.
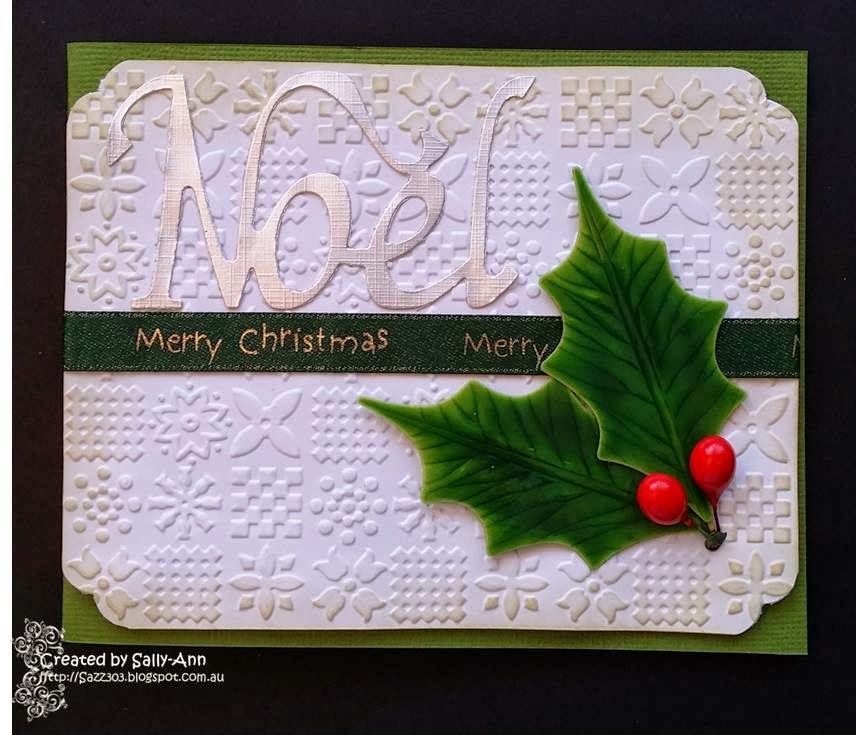
Couldn't not show you a pop-up card. I saw this lovely idea on Pinterest and thought I'd have a go at replicating it. Here is the front of the card.
I used Sizzix embossing folder, as well as a Sizzix, Karen Burniston designed Noel Pop-up insert.

Here is the inside of the pop-up card. Using a Sizzix decorative strip die and a Spellbinders Fleur de Lis die.

Here is one of two cards that are pretty similar. White card base, Kraft card for the background, a Spellbinders Edgeability die, a spellbinders pinking die and the Hero Arts and Sizzix Reindeer stamp and Die set.

... and here is the (almost) twin version of the same design.
... and there you have it 8 more Christmas cards. Here are the main ingredients I used to make these cards.


Thanks for stopping by today. Hope you have a Fantastic New Year Celebration and a very special 2014.


