Hello, I hope all is going well where you are. I thought yesterday was chilly, today the temperature has dropped even more. If it's like this where you are I suggest you snuggle up with a cup of something hot and have a read!
We have heard some good work news. It looks like we will be overseas in Kenya for 6 weeks in August. This will be a great trip as we will combine it with seeing family and friends whilst we are travelling anyway. I can already envisage the great long talks that I will have with you Clare when we get over to see you.
Today's card (and I cannot believe that I am managing a card each day!! So far so good!) is another experiment. It has some common ingredients to others I have made - - yep you've guessed it, there is a Spellbinders die or two in it!
Here it is:
I have called it "The Dreamy Fairy" you can of course see why.
How was it constructed?
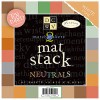
 I began again with my DCWV matchmakers card stock "neutral" stack and using the Spellbinders Labels 23 (S4 - 347) die, cut a folded layered piece of the green card stock (ensuring I kept the die just over the edge of the fold to create the hinge of the card).
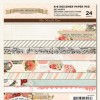
Then I cut a piece of MME - Follow Your Heart - Be Happy design paper to fit inside the shape of the card and also added a middle strip of Kaisercraft - Sweet Nothings design paper.
Using a paper piercer I made holes all round the edges of the combined Design Papers and then used a pencil to join all the dots and make it look like it had been stitched (Faux Stitching Technique) Thanks Angie Crockett from Our Daily Bread Designs for this inspiration.
Then using the Spellbinders Splendid Circles S4 - 354 and some more of the MME - Follow Your Heart - Be Happy design paper cut and embossed the bottom layer of the centre medallion. I used DST (Double Sided Tape) to add this to my "Faux stitched" panel; this than enabled me to see where I would add my ribbon, which I did next and then added a bow of the same ribbon on the top.

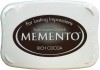
I stamped my Fairy twice onto Neenah Solar white card using a Memento Rich Cocoa ink pad.
The stamp is one I have had for a while, it is from PSX (Personal Stamp Exchange G-3247)
who do not make them any more (After January 2007). You may find it and similar Fairies (there is a set of them) on e-bay.
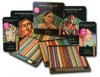
Using my Prisma Color Pencils, Gamsol and stumps I coloured and blended one of the images until I was happy with it. I then fussy cut it out ready to layer on top of the other image which I cut out and embossed using Spellbinders Circles LG (S4 - 114).
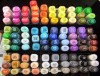
I used Copics B000 and B00 to colour the background, then I layered the two fairy images on top of one another using foam pads. Then added the Fairies to the medallion already placed on my card using DST.

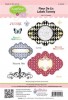
I made a sentiment using Silver Mirri Card from Flourishes and decorative edge scissors. The stamp sentiment is from Fleur De Lis Labels 20 JustRite stamps and not available there (I have added a link to where I know you can still get it).
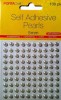
Finally adding a few pearls from Want2scrap finishes my card.
Here is the list of ingredients I used to make this card:








We have heard some good work news. It looks like we will be overseas in Kenya for 6 weeks in August. This will be a great trip as we will combine it with seeing family and friends whilst we are travelling anyway. I can already envisage the great long talks that I will have with you Clare when we get over to see you.
Today's card (and I cannot believe that I am managing a card each day!! So far so good!) is another experiment. It has some common ingredients to others I have made - - yep you've guessed it, there is a Spellbinders die or two in it!
Here it is:
I have called it "The Dreamy Fairy" you can of course see why.
How was it constructed?

Then I cut a piece of MME - Follow Your Heart - Be Happy design paper to fit inside the shape of the card and also added a middle strip of Kaisercraft - Sweet Nothings design paper.
Using a paper piercer I made holes all round the edges of the combined Design Papers and then used a pencil to join all the dots and make it look like it had been stitched (Faux Stitching Technique) Thanks Angie Crockett from Our Daily Bread Designs for this inspiration.
Then using the Spellbinders Splendid Circles S4 - 354 and some more of the MME - Follow Your Heart - Be Happy design paper cut and embossed the bottom layer of the centre medallion. I used DST (Double Sided Tape) to add this to my "Faux stitched" panel; this than enabled me to see where I would add my ribbon, which I did next and then added a bow of the same ribbon on the top.

I stamped my Fairy twice onto Neenah Solar white card using a Memento Rich Cocoa ink pad.
The stamp is one I have had for a while, it is from PSX (Personal Stamp Exchange G-3247)
who do not make them any more (After January 2007). You may find it and similar Fairies (there is a set of them) on e-bay.
Using my Prisma Color Pencils, Gamsol and stumps I coloured and blended one of the images until I was happy with it. I then fussy cut it out ready to layer on top of the other image which I cut out and embossed using Spellbinders Circles LG (S4 - 114).
I used Copics B000 and B00 to colour the background, then I layered the two fairy images on top of one another using foam pads. Then added the Fairies to the medallion already placed on my card using DST.

I made a sentiment using Silver Mirri Card from Flourishes and decorative edge scissors. The stamp sentiment is from Fleur De Lis Labels 20 JustRite stamps and not available there (I have added a link to where I know you can still get it).
Finally adding a few pearls from Want2scrap finishes my card.
Here is the list of ingredients I used to make this card:
I really appreciate you stopping by to look at today's' card, maybe even add a comment - Thanks.