Showing posts with label DCWV Mat Stacks. Show all posts

Tuesday, 15 October 2013

Good Luck in your new Home Card

Hi, thanks for stopping by today. I have a card to show you today. It is a "Moving House" card.


I used an A4 sheet of white card and cut it down to fit the Teal Cardstock (DCWV) that I had left over.

I embossed the teal cardstock using a Couture Creations Swiss dots embossing folder.
In the corners I used a crop-o-dile corner chomper.


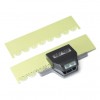
On the bottom edge I used a Spellbinders A2 Bracket Border die.
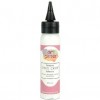
Above which I used some teal ribbon, pearls and a Carl punch to make the flowers adding some liquid pearls in their centres.


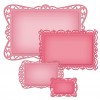
I used a Sizzix fancy frame bigz die with a centre piece "New Home" that I created on my computer.

I had the key in my stash as well as the little tag which I added the number of the new house onto.


Inside I added the branch from the bird branch bigz die and some more Carl punch flowers with white liquid pearls.

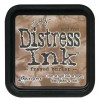
The little sentiment is something i found on the web which I coloured with a little distress stain.


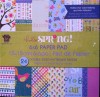
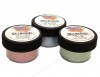
Here are most of the ingredients I used to make this card:


I hope you enjoyed your quick trip to my blog today. Thanks again for stopping by.

Thursday, 1 August 2013

A 2nd Birthday Card for Caitlin

Hello, I hope you are having a great week. I have another card commission to show you today. This time it is for a Granddaughter called Caitlin who is 2 years old later on this month. The commission is from her Nana!


Caitlin has a toy lamb called Lambie which she must have when she goes to sleep.

I made a lamb using a Spellbinders Grand scalloped die for the body (on a piece of card stock from my scrap pile) and the rest  of the lamb I hand drew and fussy cut out.

I used a glue stick and some Art Institute Glitter to make the body and head sparkle.

I added googly eyes to finish the features on the face.

I used a scrap of blue paper for the sky and a grass die to cut some green grass underneath Lambie!


A closer view of Lambie's face. I used an image I saw on Google images for my inspiration.
I used some Frayed Burlap distress ink on the edges to add dimension.


Here is the inside of the card. I made two parcels into a pop up feature, covered them in Little Yellow Bicycle design paper and Really Reasonable Ribbon.

I created the sentiments on my computer and cut one out using a Spellbinders Label 14 die, the other I fussy cut out.

I added some Roberts Confectionery Princess Cake Toppers and spelt Caitlin in beads (had these for ages no idea where I got them from!) and adhered them down with some strong scotch glue

The base sheet is from a great DCWV 12 x 12 paper pad called Sky's the limit.


Closer view of the top of the inside of the card.


A closer view of the bottom part of the inside of the card. I used Memento Angel Pink Pad on this sentiment (found on the internet and adjusted a little).


Here are the main ingredients that I used to make this card:


Thank you for stopping by and reading my Blog, I hope you and yours are well

Sunday, 14 July 2013

Cards from Fabulous Fashion

Hello my Blog family and Friends. I do hope you are well and are enjoying your weekend.
Yesterday, Saturday 13th July, we had another Made in Dorrigo Day. This is a quarterly opportunity for our small town to exhibit and sell items, made, grown, manufactured or produced within our catchment area. You will have seen previous posts where I have shown photos of my stall. It is where I can showcase some of my cards and whilst I don't make a profit it does help me to cover the costs of my hobby.

Today I have a video clip to show you. I will show some of the cards I made and included on my stall. I was so lucky to be sent a wonderful gift from my sister Clare.


This is it. It is a Double CD from Katy Sue Designs. It is wonderful; containing lots of images, templates and papers to get creative with. I had such fun making these cards with such great results.


Here is the video I promised:


Whilst there were some of the templates used from the CD-Rom, I also used a variety of other ingredients, some of which I list below:


Thank you for stopping by and viewing my post today


Related Posts Plugin for WordPress, Blogger...