
Hello my Blogging friends how are you today? It's a bit wet here today, not at all an Australian Summer; but then we are known for our extremes with hot and cold weather! Fires then Floods then Fires again - Mother Nature doin' her thing!
I have a Z card and a Video (which I filmed on January 1st!!!) of it to show you today.
I made this particular card for a Mum in Canada. I haven't made one of these in a while; in fact my first Blog (13th May 2012) was of this style of card ---> See Here.

My brief was that the Card would need to have lots of Yellow and make reference to her fondness for Crosswords.
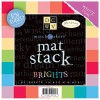
I used Kaisercraft Liquorice Weave card stock for the base of the card. The Mustard yellow card stock is from a DCWV 12 x 12 Mat stack pack. The Pale blue Yellow Rose Paper was from a HOTP 12 x 12 Paper Pad.
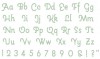
I used a QuicKutz Banana Split Skinni Mini Alphabet die set, for the words.
You can also see I picked up a Doily from my local Coffee shop (I have bought a pack since!!!!).

I have taken shots of each of the three panels on the inside as well as those on the other side. This is the front and the first panel. This card has a secret pocket in the last panel.

I know how this lovely lady always looks so presentable on her visits here to Australia, so I thought to reference this with this little ensemble.
I used an old template to create the three pieces; and decorated them with the gold mirror card offcuts of a hole punch that I had collected (we crafters don't waste a thing - I kept them in a little tin!!!). Three little gold ribbons and this panel was done.

This is the last panel (and pocket) of the card which also hold the secret panel.
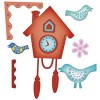
I decorated the panel with Spellbinders Cuckoo Clock S5-075, Bird Sanctuary S5-033 and a Marianne Die - "Just for You" and created the words on my PC and fussy cut them out. I used Antique Linen Distress ink pad on the edges and a few pearls in the corners of the tag.
The feathers came in a bag of feathers from a craft store.

Here is the front of the panel. a few stickers, a paper rosette and we're done.

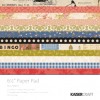
The back of the panel I covered with a sheet of Design Paper that looks like a crossword from Kaisercraft Miss Match 6.5 inch Paper Pad.

Once the writing panel is in the pocket you see the back of the last panel has a wooden Maple leave (very Canadian!!) on the reverse. I coloured this using a R29 Copic marker.

The back of the middle panel was covered with pale blue HOTP Design Paper and has a Memory Box La Rue Heart (#98255) with a Gold Ribbon attached.

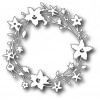
And lastly the back of the front panel. A Many Happy Returns Sticker (apologies cannot remember where I bought this) with another Memory Box Die - Catalina Wreath (#98189). I also added a few Kaisercraft White Pearls of different sizes to various parts of the cut out.
The Video clip I promised you: I have kept this for a while as I filmed it on New Years Day!
Here are the main ingredients for this card:


Thanks for stopping by today, hope you liked my card and enjoyed watching the video

I have a Z card and a Video (which I filmed on January 1st!!!) of it to show you today.
I made this particular card for a Mum in Canada. I haven't made one of these in a while; in fact my first Blog (13th May 2012) was of this style of card ---> See Here.

My brief was that the Card would need to have lots of Yellow and make reference to her fondness for Crosswords.
I used Kaisercraft Liquorice Weave card stock for the base of the card. The Mustard yellow card stock is from a DCWV 12 x 12 Mat stack pack. The Pale blue Yellow Rose Paper was from a HOTP 12 x 12 Paper Pad.
I used a QuicKutz Banana Split Skinni Mini Alphabet die set, for the words.
You can also see I picked up a Doily from my local Coffee shop (I have bought a pack since!!!!).

I have taken shots of each of the three panels on the inside as well as those on the other side. This is the front and the first panel. This card has a secret pocket in the last panel.

I know how this lovely lady always looks so presentable on her visits here to Australia, so I thought to reference this with this little ensemble.
I used an old template to create the three pieces; and decorated them with the gold mirror card offcuts of a hole punch that I had collected (we crafters don't waste a thing - I kept them in a little tin!!!). Three little gold ribbons and this panel was done.

This is the last panel (and pocket) of the card which also hold the secret panel.
I decorated the panel with Spellbinders Cuckoo Clock S5-075, Bird Sanctuary S5-033 and a Marianne Die - "Just for You" and created the words on my PC and fussy cut them out. I used Antique Linen Distress ink pad on the edges and a few pearls in the corners of the tag.
The feathers came in a bag of feathers from a craft store.

Here is the front of the panel. a few stickers, a paper rosette and we're done.

The back of the panel I covered with a sheet of Design Paper that looks like a crossword from Kaisercraft Miss Match 6.5 inch Paper Pad.

Once the writing panel is in the pocket you see the back of the last panel has a wooden Maple leave (very Canadian!!) on the reverse. I coloured this using a R29 Copic marker.

The back of the middle panel was covered with pale blue HOTP Design Paper and has a Memory Box La Rue Heart (#98255) with a Gold Ribbon attached.

And lastly the back of the front panel. A Many Happy Returns Sticker (apologies cannot remember where I bought this) with another Memory Box Die - Catalina Wreath (#98189). I also added a few Kaisercraft White Pearls of different sizes to various parts of the cut out.
The Video clip I promised you: I have kept this for a while as I filmed it on New Years Day!
Here are the main ingredients for this card:
Thanks for stopping by today, hope you liked my card and enjoyed watching the video


