Showing posts with label Wedding Card. Show all posts

Saturday, 21 June 2014

A Wedding Card for Tegan and Robert

Hello my blogging friends. How has your week been? I have been on my travels and once again glad to have spent a little time in my crafting space. For my post today I am sharing a Wedding Card that I was commissioned to make for a Tegan and Robert. I was requested to make a big wedding card in a box.

OK. So here are some photos of what I made:


Let's begin with the box. I made this of kraft coloured Chipboard and covered it with some beautiful Cristina Re Oriental Rose wedding paper I found at Office Works, then added an organza 7/8 inch white ribbon on the outside which I purchased from Really Reasonable Ribbon


When you remove the lid you see a box lining made of crepe paper.


To keep the top flap of the box lining in place I added a flower, a couple of leaves and three pearls.


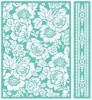
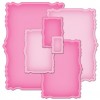
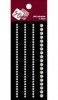
Here is the front of the card. I decided to make a middle step card. I used a silver paper to mat the panels and the panels themselves I embossed using a  Cuttlebug Anna Griffin Poppy Border set 5" x 7". On top of the panels I added some Want2scrap swirls (6074) pearls in white, with some stemmed star flowers I purchased from My2 angels. I added some 3mm white pearls at each corner of the panels.

The T and R initials I die cut with an alphabet die set and the sentiments are from a silver wedding peel-off.


Here s the card out of the box standing on its side and shows how the step card stands.


... and here is the card photographed on its side again it gives you a view of the step features.


Last image is of the back of the card. I added a writing panel, a little wired white butterfly and a stamped sentiment in silver encore ink which I die cut using a small circle spellbinders die.


The main ingredients I used to make this card:


Thanks for stopping by to read today's post. Have a super weekend

Saturday, 27 July 2013

Red, Black & White Wedding Card

Hello my Blog Friends and Family. I hope you are having a great weekend and using the time to take a little R & R if this is possible for you. We have been madly trying to get flights organised at the very last minute for a business meeting in Athens - Greece. This is not an easy task and Frits has been at his computer and talking with an endless list of Travel organisers for the last two days to see if he can get the best deal that is possible. This is always something we work hard to do when our customer is footing the bill! The dilemma is that you think you have a fight and by the time you get the go ahead from your customer the flight has gone. I must admit though we have not tried to book flights so close to the flight date before! The good news is that we now have flight Tickets.

Today I have a card to show you. It was another commission and also a Challenge! A Wedding card that connected to the Beach and the three colours of Red, Black & White! I did a video of the card and because you cannot see it in its entirety I also took some photos.


Here is the card in its entirety.


The couple are called Sarah & Steven.


I was a little vague on the YouTube clip about the ingredients so I have shown the actual ones I used below.

I used a sheet of 210gsm Quill A3 white cardstock that I purchased from Office works as my card base. I cut this to size once I knew the size of the top layer once I had completed it.


Here's a closer view of the top of the card. I created their names on the computer and die cut them out with a Spellbinders Tags die.


I used Spellbinders Floral Ovals as the base of the central medallion, then used Just rite stamps Sea Shell Bay Labels Twenty Two - cling CL-02220 which I stamped in Tuxedo Black Memento Ink then used Copic R27 & R29 to colour in some of the elements then added red kaisercraft Rhinestones.

The label at the bottom is from the Botanical Medallions & Banners CR-03705 which I also stamped in Tuxedo Black Memento Ink.

The background stamp in the glorious Festive Berries Tim Holtz ink pad is Just Rite Secret Garden Background Stamp CL-04490.


At the bottom of the card I used shells from the Sea Shell Bay Labels stamps. I covered them with Diamond glaze for a glossy hard finish. I added this little label created using Spellbinders labels Twenty Two and the Just rite stamp set called Oceanside Oval Medallion Cling CL-03645.

The edges at the bottom were made using Spellbinders Classic scallop Edge E8-001 as well as the Classic Decorative inserts four E8-012 in Liquorice and scarlet Kasiercraft weave cardstock.


This is the inside of the card, I used Spellbinders labels Twenty Nine to cut out the sentiment that I created on my computer.
The sentiment is a Gold Rub on and the couple is a cake decoration I purchased at a cake decorating shop.


Here is the video clip I promised:


The main ingredients that I used to make this card:


Thanks for stopping by and reading my post today, hope you continue to have a great weekend

Thursday, 25 July 2013

A Garden Wedding Card

Thanks for stopping by again, I promised to post a card today.

I was asked to make a Wedding card for two people who will have their wedding in a garden. I decided that I would use Graphic 45's Secret Garden papers and that led me to make the card I did.

Here it is:


It is a front step card.
I used Kaisercraft Lilac weave cardstock as the base and G45 Secret Garden Beautiful Blooms Design Paper.

The stamps are from Just rite stampers:
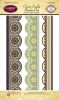
The Kindness Cling set - CL-02095 and the Classic Scallop Borders One Clear set CR-03625.


The central medallion was stamped using versamark ink and then heat embossing with white opaque embossing powder.

The sentiment was made by cutting up a gold peel off to fit inside the centre circle. I used dimensional foam pads to adhere the two layers together.


I used drop pearls from my stash ( I think I got these on e-bay) with little spacers (from spotlight) and stitched these on with very thin bead thread (also available from Spotlight).
I added the spacers with a little strong clear drying glue. (3M Scotch Glue).


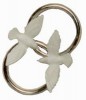
A closer view of the Gold Wedding ring embellishments - I got these from a cake decorating shop, however I found them cheaper from the link I have provided below in the ingredients list from New Zealand.


I just love this charm from My2Angels. I have had it for ages because I love it so much and didn't want to use it - however felt this card was a perfect use for it.


Another cake decorating piece, this time cake toppers of a Bride and Groom. They come attached to Tooth Picks. I just cut these off and glued them with string glue. (I bought these at Spotlight in their baking and cake decorating department).


This is a tag that I cut from Graphic 45 Secret Garden May Flowers Design Paper. I added it to the back of the card as a writing panel, onto which I added a "Congratulations" peel off.


Another view of this card at a different angle.


The main ingredients I used to make this card:


Thanks for stopping by. I hope your day has gone well

Related Posts Plugin for WordPress, Blogger...