Thanks for stopping by to read my blog today. Today's post shows another card I have made using the Heartfelt Creations Botanic Orchid collection.
Here is my card:

I began by using American Crafts white card stock for the base of my card. I then matted a piece of the Tanya Whelan (gorgeous) design papers with some green pastel american crafts card stock.

I then cut a piece of Silver mirror card to create the backing for my layers.
Using the silver mirror card I used the Ara Gemini die to add a little feature at the top of this layer.
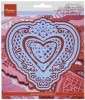
I cut out a white die cut using the Heartfelt Creations Botanic Window die and laid this on top of the silver mirror card.
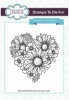
Then it was a case of adding these gorgeous Botanic Orchid images and the Hummingbird, which I stamped, cut out and coloured with distress inks and a water brush.
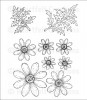
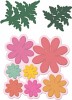
I also added some leaves using the Sue Wilson Delicate Fronds.
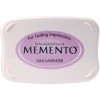
Then at the bottom I added a flower and leaves using the Heartfelt creations Delightful Daisies stamps and dies which I heat embossed in white and coloured using a dauber and a Memento Lulu Lavender ink pad

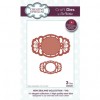
I then added the "Happy Birthday" sentiment which I cut out using an Elizabeth Craft designs die in silver mirror card and matted it on the same pastel green card stock I had used previously.
It looks really beautiful in "real life" far better than what I first thought it would look like!
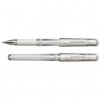
Here are the main ingredients that I used to make this card:
I do hope you enjoyed looking at this card and how I made it.

Here is my card:

I began by using American Crafts white card stock for the base of my card. I then matted a piece of the Tanya Whelan (gorgeous) design papers with some green pastel american crafts card stock.

I then cut a piece of Silver mirror card to create the backing for my layers.
Using the silver mirror card I used the Ara Gemini die to add a little feature at the top of this layer.
I cut out a white die cut using the Heartfelt Creations Botanic Window die and laid this on top of the silver mirror card.
Then it was a case of adding these gorgeous Botanic Orchid images and the Hummingbird, which I stamped, cut out and coloured with distress inks and a water brush.
I also added some leaves using the Sue Wilson Delicate Fronds.
Then at the bottom I added a flower and leaves using the Heartfelt creations Delightful Daisies stamps and dies which I heat embossed in white and coloured using a dauber and a Memento Lulu Lavender ink pad

I then added the "Happy Birthday" sentiment which I cut out using an Elizabeth Craft designs die in silver mirror card and matted it on the same pastel green card stock I had used previously.
It looks really beautiful in "real life" far better than what I first thought it would look like!
Here are the main ingredients that I used to make this card:
 |  |  |  | |
 |  |  |  |  |
 |  |  |  |  |
 |  |  |  |
I do hope you enjoyed looking at this card and how I made it.