As soon as I saw Karen Burniston from Elizabeth Craft Designs show how to make this style of card (Cascading) on YouTube I had to have a go. It makes use of a die that you use in a totally different way than how you might use it. The Adirondack Chair!
Here's Karen's video with the technique shown:
I wanted to make a Thank You card for a UK colleague. I am there next week for a week and she is doing a whole heap of work for me so I wanted to say Thank you to her. This one is for you Hazel!
Here's the card:
 Here is the front of the card!
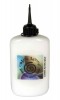
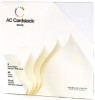
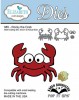
I used some First Edition Boho Chic paper, on top of my card base made with white American craft cardstock. Then used ECD Rocky the Crab (985) and also a clear stamp from ECD called What's Up? I used black Ranger Archival ink as I find this works really well with polymer stamps - similar to Stazon but easier to clean yous tamp afterwards.

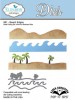
Here is the card when you open it up. I have some other pictures that take a closer look at each half of the card coming up so you can see in more detail. Here you can see how the ECD Beach Edges die was used.

I added a little anchor as a hanging charm - sorry not sure where I got this from (same goes for the compass I use on the other side).
Seam binding came from Anna's Craft Cupboard.

I cut rocky out of cardstock from Boho Chic added sticky sheet over the card before I cut him out and then glittered him with ECD Warm diamond glitter. The ribbon is from Really Reasonable Ribbon.

Here is the other half of the card. I added shells (they come with Rocky the Crab).
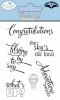
The Thank You stamp is from the creative expressions elegant sentiments clear stamp set.

Here you can see things closer, I took the photo face on so you can see the charms hanging.

Here you can see the effect when I took the shot looking down on the card. It gives the shape of the card far better than you can see from the other photos.

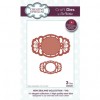
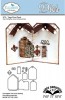
and finally here is the back of the card. All the tags used are from ECD Tag Pivot Die 973. It's a very versatile die that's for sure.
... if you look at the YouTube video you can see I was VERY inspired by Karen's card - as this was my first I wanted to follow the instructions as it can be fiddly until you know what you are doing. I think I might make some more of these!!
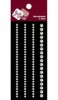
The main ingredients that I used to make this card:
Thanks for stopping by today. If you have the dies - do have a go at making this card - it looks so effective when you put it all together.

Here's Karen's video with the technique shown:
I wanted to make a Thank You card for a UK colleague. I am there next week for a week and she is doing a whole heap of work for me so I wanted to say Thank you to her. This one is for you Hazel!
Here's the card:

I used some First Edition Boho Chic paper, on top of my card base made with white American craft cardstock. Then used ECD Rocky the Crab (985) and also a clear stamp from ECD called What's Up? I used black Ranger Archival ink as I find this works really well with polymer stamps - similar to Stazon but easier to clean yous tamp afterwards.

Here is the card when you open it up. I have some other pictures that take a closer look at each half of the card coming up so you can see in more detail. Here you can see how the ECD Beach Edges die was used.

I added a little anchor as a hanging charm - sorry not sure where I got this from (same goes for the compass I use on the other side).
Seam binding came from Anna's Craft Cupboard.

I cut rocky out of cardstock from Boho Chic added sticky sheet over the card before I cut him out and then glittered him with ECD Warm diamond glitter. The ribbon is from Really Reasonable Ribbon.

Here is the other half of the card. I added shells (they come with Rocky the Crab).
The Thank You stamp is from the creative expressions elegant sentiments clear stamp set.

Here you can see things closer, I took the photo face on so you can see the charms hanging.

Here you can see the effect when I took the shot looking down on the card. It gives the shape of the card far better than you can see from the other photos.

and finally here is the back of the card. All the tags used are from ECD Tag Pivot Die 973. It's a very versatile die that's for sure.
... if you look at the YouTube video you can see I was VERY inspired by Karen's card - as this was my first I wanted to follow the instructions as it can be fiddly until you know what you are doing. I think I might make some more of these!!
The main ingredients that I used to make this card:
 |  |  |  | |
 |  |  |  |  |
 |
Thanks for stopping by today. If you have the dies - do have a go at making this card - it looks so effective when you put it all together.