Hello, how are you today?
A quick posting from me. Just like when you "Batch" cook you can make cards in batches too. So I have a showing of triplet cards for you today. All similar and with their own idiosyncrasies!
Here they are:


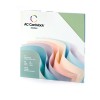
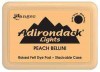
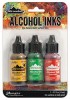
Using any of your Adirondack (or any brand) alcohol inks you spot the colours all over the cut piece of GLOSSY card and they spread themselves out creating this glorious coloured background and it's as simple as that. They all come out looking slightly different even when you use the same coloured inks.
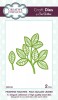
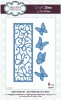
Let these dry and as you wait cut out of white card stock the other dies in the striplet set including the 4 butterflies that match the rest of the die.
JUST A NOTE: when cutting out the main body of the striplet die keep the bits (sometimes called the die confetti) - just the butterfly pieces and glue them back into the die cut.
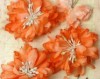
Then bend and fold a little area on the middle of the separate butterflies and glue them to the striplet as shown here on this photograph over their matching partners.
By doing this you add a little dimension as the wings look like they are flapping!
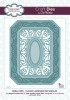
Then using the St. Barts die from the Caribbean collection cut two in white card stock. Then guillotine them down the centre (north to south); place the two halves together and then cut a little off. Stick them back together on the back with tape.
Then cut them in the middle again this time west to east, place the two halves together and then cut a little off. Stick them back together on the back with tape. You end up with a longer die cut as a backdrop for your butterflies.

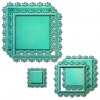
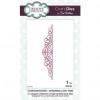
Note sure you can see this too well from the photo as the cuts get hidden by the next step which is to cut the Configuration Charming Lace die twice (one for each side). Then put them together one on top of the other using a strong glue.
I then added all that had been created so far to my card base, with a few pearls, one in each corner.

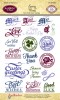
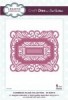
I used an oval die from one of the Noble die sets (Classic adorned rectangles) and stamped an image using one of Phill's stamp sets (see the ingredients list below for details) than inked it using blue Cosmic cloud.
...... and there you have it.
The main ingredients that I used to make this card:
Hope you like my card. I was very taken by it after Sue showed how to make it on her blog. I think she has a video on how to do it too. Check out her channel on YouTube.

A quick posting from me. Just like when you "Batch" cook you can make cards in batches too. So I have a showing of triplet cards for you today. All similar and with their own idiosyncrasies!
Here they are:

A card idea from Sue Wilson and these were quite simple to make and whilst I was making one, I decided to make a few. It uses the Butterfly striplet die from Sue Wilson as well as a Configurations lace die and a cut up and re-past of St Barts die.
OK, You begin by using the outer cutting die of the Butterfly striplet to cut pieces of GLOSSY paper. It has to be GLOSSY card as the next step won't work as well if you use other types of card.

Using any of your Adirondack (or any brand) alcohol inks you spot the colours all over the cut piece of GLOSSY card and they spread themselves out creating this glorious coloured background and it's as simple as that. They all come out looking slightly different even when you use the same coloured inks.
Let these dry and as you wait cut out of white card stock the other dies in the striplet set including the 4 butterflies that match the rest of the die.
JUST A NOTE: when cutting out the main body of the striplet die keep the bits (sometimes called the die confetti) - just the butterfly pieces and glue them back into the die cut.
Then bend and fold a little area on the middle of the separate butterflies and glue them to the striplet as shown here on this photograph over their matching partners.
By doing this you add a little dimension as the wings look like they are flapping!
Then using the St. Barts die from the Caribbean collection cut two in white card stock. Then guillotine them down the centre (north to south); place the two halves together and then cut a little off. Stick them back together on the back with tape.
Then cut them in the middle again this time west to east, place the two halves together and then cut a little off. Stick them back together on the back with tape. You end up with a longer die cut as a backdrop for your butterflies.

Note sure you can see this too well from the photo as the cuts get hidden by the next step which is to cut the Configuration Charming Lace die twice (one for each side). Then put them together one on top of the other using a strong glue.
I then added all that had been created so far to my card base, with a few pearls, one in each corner.

I used an oval die from one of the Noble die sets (Classic adorned rectangles) and stamped an image using one of Phill's stamp sets (see the ingredients list below for details) than inked it using blue Cosmic cloud.
...... and there you have it.
The main ingredients that I used to make this card:
 |  |  |  |  |
 |  |  | ||
 |  |
Hope you like my card. I was very taken by it after Sue showed how to make it on her blog. I think she has a video on how to do it too. Check out her channel on YouTube.