Hi, I hope your day is going REALLY well! I have been playing with "Slider" cards and today's card is another example of one of these cards. I saw Christina Griffiths demoing this on YouTube and thought 'd have a go too.
Here's the video that caught my eye:
If you cannot see this copy and paste the following into your browser and that should do the trick!
https://www.youtube.com/watch?v=Xn4l4iAo5ok
So here's my version of this type of card!

I used Kaisercraft Grape weave cardstock for my card base, American Crafts white cardstock, clear acetate and a Jet Black Stazon ink pad.
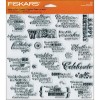
The stamp is an old Flourishes image, sadly they are no longer in business. However, the artist Marcella Hawley has her own business called "Poppy Power" and the link in the ingredients to the stamps I am using is her variation of this stamp. You can also see it >>>> HERE.
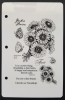
The flower is Tattered Blossoms from Heartfelt Creations with glitter added.
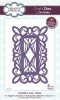
The flourishes are from Arianna Blooms Lace die from Heartfelt Creations as well.
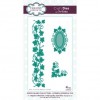
The ivy is a Sue Wilson die from the Greek Collection.
The rest of my photos just show the slider in action..........

Just a little pull on the tag and the magic starts to happen!
By The Way the white "Film Strip" on the side of the card is an old white peel off that I have had in my stash for ages.
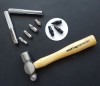
I used a Fiskars one inch punch to make the tabs and pull space. I used a yellow eyelet and an eyelet setting tool so the ribbon could be added.

A little bit more and the flowers come into bloom. I coloured the images using a variety of Copics.

Voila!

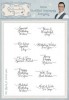
Here's how I decorated the back of the card. The sentiment is from JustRite Stamps, the cardstock is from a Kasiercraft "Sweet Treats" 12 x 12 paper pad and finally the punch used on the back panel of the card is from Martha Stewart.
Here are the main ingredients that I used to make this card:
Thanks for stopping by today. I hope you enjoyed this card. Why not have a go at making one yourself? It's interactive and always generates a "Wow' response from the recipient!

Here's the video that caught my eye:
If you cannot see this copy and paste the following into your browser and that should do the trick!
https://www.youtube.com/watch?v=Xn4l4iAo5ok
So here's my version of this type of card!

I used Kaisercraft Grape weave cardstock for my card base, American Crafts white cardstock, clear acetate and a Jet Black Stazon ink pad.
The stamp is an old Flourishes image, sadly they are no longer in business. However, the artist Marcella Hawley has her own business called "Poppy Power" and the link in the ingredients to the stamps I am using is her variation of this stamp. You can also see it >>>> HERE.
The flower is Tattered Blossoms from Heartfelt Creations with glitter added.
The flourishes are from Arianna Blooms Lace die from Heartfelt Creations as well.
The ivy is a Sue Wilson die from the Greek Collection.
The rest of my photos just show the slider in action..........

Just a little pull on the tag and the magic starts to happen!
By The Way the white "Film Strip" on the side of the card is an old white peel off that I have had in my stash for ages.
I used a Fiskars one inch punch to make the tabs and pull space. I used a yellow eyelet and an eyelet setting tool so the ribbon could be added.

A little bit more and the flowers come into bloom. I coloured the images using a variety of Copics.

Voila!

Here's how I decorated the back of the card. The sentiment is from JustRite Stamps, the cardstock is from a Kasiercraft "Sweet Treats" 12 x 12 paper pad and finally the punch used on the back panel of the card is from Martha Stewart.
Here are the main ingredients that I used to make this card:
 |  |  |  | |
 |  |  | ||
 | ||||
 |  |
Thanks for stopping by today. I hope you enjoyed this card. Why not have a go at making one yourself? It's interactive and always generates a "Wow' response from the recipient!