Hello how are you today. It's hard to believe that it is already the first day of February already. I hope I find you well and enjoying the start of your weekend.
I have a project to share with you today. Something I made for my Grandson Harrison. It is another Bird House and Photo Album. I have photos as well as a video clip to show you.

Here we go with the Bird House itself. I'll add the papers I used to cover the chipboard in the list of ingredients. The main papers are from Simple Stories and Bo Bunny. I also used some Kaisercraft Base Coat papers.

Here is a closer view of the front. I used Jute twine for the top of the deck and on the front I used a chipboard anchor which I distressed with some silver and bronze Adirondack ink.

The back of the Bird House remains fairly simple. The roof is covered with the Kaisercraft paper.

By lifting the roof you access the album inside the house.

Here is the album outside of the Bird House.

The album I covered with some Graphic 45 paper and some more of the Bo Bunny paper. I cut some strips using a Tim Holtz vintage lace die to join the edges. I made a hole in the tops of the album and used some navy cord I had in my sewing basket as the tie mechanism.

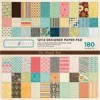
Inside the album I used a MME paper pad. I can't think of the name off-hand but I will find it and place it in my ingredients list.
The album is made of 6 pages that look like boats, I decided to decorate them as the first six winners of the 2013 Boxing Day Sydney to Hobart yacht race. Tags then sit inside them and it is on the tags that you stick your photos, journals etc.
Inside the front cover I made a pocket with a tag which on one side I wrote a message to Harrison with a photo I had of him on the other side.

The larger Tags are folded in half and have four spaces to stick larger photos. The smaller tags are double sided and allow for journalling space or smaller images.
This boat was Wild Oats.

The next boat is Perpetual Loyal and you can see how I decorated the tags using the MME papers.

On the Ragamuffin boat I added another couple of photos of Harrison, this time I used some Cricket stickers and a photo of him playing cricket.


These may not be in order but you get the idea.

The last one of the six with the tags open for you to see.

and back to the house again. I wanted to show you the acrylic on the sides and under the deck. Underneath the acrylic is sand - yes real sand and some sea shells.
You can also see the wooden perch that I had made locally by someone who has a lathe. The Life belt I made using white and red card from my scraps. I used a Copic marker to distress the white colour a little. Then I added some red and white Bakers Twine around the edges.
OK that's all the photos. I also made a video clip of the project and I link that here if you'd like to have a look.
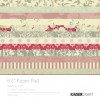
Here are some of the main ingredients I used to make this project:
Thank you for stopping by today - it's a long post but I hope you liked it

I have a project to share with you today. Something I made for my Grandson Harrison. It is another Bird House and Photo Album. I have photos as well as a video clip to show you.
Here we go with the Bird House itself. I'll add the papers I used to cover the chipboard in the list of ingredients. The main papers are from Simple Stories and Bo Bunny. I also used some Kaisercraft Base Coat papers.
Here is a closer view of the front. I used Jute twine for the top of the deck and on the front I used a chipboard anchor which I distressed with some silver and bronze Adirondack ink.
The back of the Bird House remains fairly simple. The roof is covered with the Kaisercraft paper.
By lifting the roof you access the album inside the house.
Here is the album outside of the Bird House.
The album I covered with some Graphic 45 paper and some more of the Bo Bunny paper. I cut some strips using a Tim Holtz vintage lace die to join the edges. I made a hole in the tops of the album and used some navy cord I had in my sewing basket as the tie mechanism.
Inside the album I used a MME paper pad. I can't think of the name off-hand but I will find it and place it in my ingredients list.
The album is made of 6 pages that look like boats, I decided to decorate them as the first six winners of the 2013 Boxing Day Sydney to Hobart yacht race. Tags then sit inside them and it is on the tags that you stick your photos, journals etc.
Inside the front cover I made a pocket with a tag which on one side I wrote a message to Harrison with a photo I had of him on the other side.
The larger Tags are folded in half and have four spaces to stick larger photos. The smaller tags are double sided and allow for journalling space or smaller images.
This boat was Wild Oats.
The next boat is Perpetual Loyal and you can see how I decorated the tags using the MME papers.
On the Ragamuffin boat I added another couple of photos of Harrison, this time I used some Cricket stickers and a photo of him playing cricket.
These may not be in order but you get the idea.
The last one of the six with the tags open for you to see.
and back to the house again. I wanted to show you the acrylic on the sides and under the deck. Underneath the acrylic is sand - yes real sand and some sea shells.
You can also see the wooden perch that I had made locally by someone who has a lathe. The Life belt I made using white and red card from my scraps. I used a Copic marker to distress the white colour a little. Then I added some red and white Bakers Twine around the edges.
OK that's all the photos. I also made a video clip of the project and I link that here if you'd like to have a look.
Here are some of the main ingredients I used to make this project:




Thank you for stopping by today - it's a long post but I hope you liked it