August! REALLY .... wow it has been a while. Well my dear blogging friends and family I have made some time to add a new post, at long last. I must admit our new NBN ISP has caused me some frustration in past months as we have tried to balance the limitations of data available. Work of course uses quite a bit and I work from home most days. Unfortunately we were so used to unlimited data, to now find we have limits comes as a bit of a shock!
So, I hope today's post finds you well and if you are celebrating the Chinese New Year of the Rooster "Gong Xi Fa Cai".
I made some lovely cards over Christmas which I needed to send off and didn't take pictures of, however I have made more since (ready for next year) and I will see about posting them as soon as I can.
Today's card is one I was asked to make by a friend for her Mother-in-law Elaine's 80th Birthday which is in February, on Valentines day actually but celebrations will be taking place on Sunday 12th.
This has turned out to be a long post with lots of pictures - so make sure to grab yourself a cup of your favourite beverage and read on!
So without further ado let me show you what I made for her.
 I made a box for the card as often recipients ask for no presents but then a card becomes more of a gift in itself.
I have a few pictures of the box so you can see how I decorated it.
I made it from Black 12 x 12 chipboard and used construction strips to join it all together.
The paper is from my stash and is from an old HOTP Joys Vintage 12 x 12 paper pad. Not sure if this is available any longer.
The letter is a Kaisercraft MDF product which I covered with matching design paper and the 1.5 inch ribbon added to finish it off.

You can see more of the ribbon here which I wrapped around the top lid of the box.
Here a glimpse of the card which measures 6 x 6 inches (approx 15.3 cm x 15.3 cm).

I lined the inside of the box with matching design paper.

Last image of the box, this time showing how I added design paper punched with a Martha Stewart punch to the corners for decorative effect.
OK onto the card itself ........

The card fits quite snugly inside its own box. Sorry included on more of the box - did I mention I was very happy about the box I made!!!

.... and here's the card!
It is a Z fold card and I used some instructions in a You tube video which I will add a link to in a moment.
This style of card was one I described in my very first posting on my blog and you can see the other two examples HERE.
Here is the link to a video by Cheryl that I used to get the measurements from.
Here is the card now fully opened so you can see how I decorated it. The brief was to include pinks and purples, butterflies and dragonflies and her hobby is sewing.

FRONT PANEL
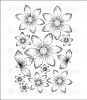
I used Heartfelt Creations Sun Kissed Fleurs stamped on vellum, white heat embossed the image, die cut them out then used scissors to fringe the petals, I used a Rose Bud memento ink pad and Lime Pastel chalk pad to colour the vellum. The circle was from one of the Italian Collection dies (Decorative Frames) from Sue Wilson. The 80 were from Spotlight (an Australian store).
MIDDLE PANEL
I raided my stash and found a pink die cut piece which fitted my needs for the middle panel. It is a Spellbinders die - Lace Doily Motifs (S5 -063). The decorations were from my sticker folder and I no longer have their source. I also added a wired mauve butterfly which I know you can get at most Crafting Stores or on e-Bay.
BACK PANEL
This is actually a pocket and contains a tag which I'll show you in a minute. I decorated this with pieces from my stash. Clare, you gave me a couple of the die cut butterflies - I think they are Spellbinders dies that I do not have. A couple of flowers on top of the pale pink die cut which is a Spellbinders Labels 46 Decorative Elements die (S4-494). The sewing pieces were again from my stash and were some decorative buttons that I have had for ages!

In reverse now .... the back of the card. I notice some people do not decorate the backs of their Z fold cards, I decided I would.
BACK PANEL
Matted with a piece of American Crafts pastel card stock (from my stash), the sentiment was a white peel off. The swirls were a Bella (Brand) product. The 80 was cut out using a Cottage Cutz Candles petite die that I die cut out of pink scraps then covered in glossy accents to add an enameled effect. I coloured the little "flames" with copics.
MIDDLE PANEL
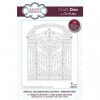
I matted this with a piece of the design paper from the HOTP pad, then added the Sue Wilson Arbour Gate die CED 9403. More buttons of dragonflies from my stash, as well as a cute little hat and another butterfly sticker and that panel was complete.
FRONT PANEL
I used the Heartfelt creations Raindrops on Roses die (HCD1 743) cut out of white card stock, a ribbon and a diamante crystal "E" letter at the bottom - also fro Spotlight (just realised this is hard to see in the photo but it is there!).

Here is the card standing up in its "Z-fold" formation.

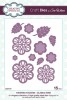
I mentioned the back panel was in fact a pocket, this contain a tag that can be used as another writing panel. Great for adding a photo of the family onto as well. I made a rose flower using the Sue Wilson "classic Rose die CED 1407.
The panel in pale pink was made using a Fleur de Lis Spellbinders die (S4-317).

Here you can see the tag in more detail. I used a piece of Washi tape in the middle of the back side of the tag to join the two pieces of the matting together.
There you have it.
The main ingredients that I have used to make this card are:
Thank you for joining me on my blog today and taking the time to read today's post. THANK YOU!

So, I hope today's post finds you well and if you are celebrating the Chinese New Year of the Rooster "Gong Xi Fa Cai".
I made some lovely cards over Christmas which I needed to send off and didn't take pictures of, however I have made more since (ready for next year) and I will see about posting them as soon as I can.
Today's card is one I was asked to make by a friend for her Mother-in-law Elaine's 80th Birthday which is in February, on Valentines day actually but celebrations will be taking place on Sunday 12th.
This has turned out to be a long post with lots of pictures - so make sure to grab yourself a cup of your favourite beverage and read on!
So without further ado let me show you what I made for her.

I have a few pictures of the box so you can see how I decorated it.
I made it from Black 12 x 12 chipboard and used construction strips to join it all together.
The paper is from my stash and is from an old HOTP Joys Vintage 12 x 12 paper pad. Not sure if this is available any longer.
The letter is a Kaisercraft MDF product which I covered with matching design paper and the 1.5 inch ribbon added to finish it off.

You can see more of the ribbon here which I wrapped around the top lid of the box.
Here a glimpse of the card which measures 6 x 6 inches (approx 15.3 cm x 15.3 cm).

I lined the inside of the box with matching design paper.

Last image of the box, this time showing how I added design paper punched with a Martha Stewart punch to the corners for decorative effect.
OK onto the card itself ........

The card fits quite snugly inside its own box. Sorry included on more of the box - did I mention I was very happy about the box I made!!!

.... and here's the card!
It is a Z fold card and I used some instructions in a You tube video which I will add a link to in a moment.
This style of card was one I described in my very first posting on my blog and you can see the other two examples HERE.
Here is the link to a video by Cheryl that I used to get the measurements from.
Here is the card now fully opened so you can see how I decorated it. The brief was to include pinks and purples, butterflies and dragonflies and her hobby is sewing.

FRONT PANEL
I used Heartfelt Creations Sun Kissed Fleurs stamped on vellum, white heat embossed the image, die cut them out then used scissors to fringe the petals, I used a Rose Bud memento ink pad and Lime Pastel chalk pad to colour the vellum. The circle was from one of the Italian Collection dies (Decorative Frames) from Sue Wilson. The 80 were from Spotlight (an Australian store).
MIDDLE PANEL
I raided my stash and found a pink die cut piece which fitted my needs for the middle panel. It is a Spellbinders die - Lace Doily Motifs (S5 -063). The decorations were from my sticker folder and I no longer have their source. I also added a wired mauve butterfly which I know you can get at most Crafting Stores or on e-Bay.
BACK PANEL
This is actually a pocket and contains a tag which I'll show you in a minute. I decorated this with pieces from my stash. Clare, you gave me a couple of the die cut butterflies - I think they are Spellbinders dies that I do not have. A couple of flowers on top of the pale pink die cut which is a Spellbinders Labels 46 Decorative Elements die (S4-494). The sewing pieces were again from my stash and were some decorative buttons that I have had for ages!

In reverse now .... the back of the card. I notice some people do not decorate the backs of their Z fold cards, I decided I would.
BACK PANEL
Matted with a piece of American Crafts pastel card stock (from my stash), the sentiment was a white peel off. The swirls were a Bella (Brand) product. The 80 was cut out using a Cottage Cutz Candles petite die that I die cut out of pink scraps then covered in glossy accents to add an enameled effect. I coloured the little "flames" with copics.
MIDDLE PANEL
I matted this with a piece of the design paper from the HOTP pad, then added the Sue Wilson Arbour Gate die CED 9403. More buttons of dragonflies from my stash, as well as a cute little hat and another butterfly sticker and that panel was complete.
FRONT PANEL
I used the Heartfelt creations Raindrops on Roses die (HCD1 743) cut out of white card stock, a ribbon and a diamante crystal "E" letter at the bottom - also fro Spotlight (just realised this is hard to see in the photo but it is there!).

Here is the card standing up in its "Z-fold" formation.

I mentioned the back panel was in fact a pocket, this contain a tag that can be used as another writing panel. Great for adding a photo of the family onto as well. I made a rose flower using the Sue Wilson "classic Rose die CED 1407.
The panel in pale pink was made using a Fleur de Lis Spellbinders die (S4-317).

Here you can see the tag in more detail. I used a piece of Washi tape in the middle of the back side of the tag to join the two pieces of the matting together.
There you have it.
The main ingredients that I have used to make this card are:
 |  |  | ||
 |  |  |  | |
 |  |  |  | |
 |  |  |  |  |
Thank you for joining me on my blog today and taking the time to read today's post. THANK YOU!