Showing posts with label Baker's Twine. Show all posts

Friday, 17 July 2015

Happy Birthday (green rectangle stained glass window technique) card

Hello, how are you? Today has been REALLY REALLY cold even for Dorrigo! Last night we had temperatures of minus 2 degrees. Today the wind just strips any heat away, out of the wind the sun is quite lovely. I hope wherever you are the day has been beautiful.


Here is another of the stained glass window technique cards that I mentioned I'd be showing you in previous blogs, so here goes:


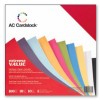
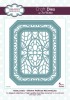
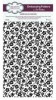
I used a sheet of green American Crafts cardstock in conjunction with the white cardstock. The embossing folder is from Sue Wilson as well as the Sue Wilson (creative Expressions - Noble Collections) Ornate pierced rectangles die.


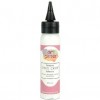
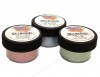
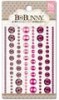
By adhering a piece of clear acetate behind the first die cut then adding (Purple, bright pink and yellow) Art Institute glue and glitter ensures that when they all dry these beautiful colours twinkle through on the right side. I added small pink rhinestones at the corners and a 8mm pink pearl in the centre. I added a bright pink ribbon (from Really Reasonable Ribbon) in the top right hand corner


I used three roses from Wild Orchid Crafts that I have had for ages and combined them with some baker's twine and light green tulle.


The main ingredients I used to make this card were:


Thanks for stopping by to read today's post. I have three more cards using this technique to show you so they'll be coming this way soon

Tuesday, 6 November 2012

A Starfold Birthday Card For Ngaire

Hello! It's been a little while I know since my last post and I hope you have been keeping well during that time.
I have a card for you today that was commissioned for a New Zealand lady who will be celebrating her 80th Birthday. It is the second time I have attempted this particular style of card and I am glad to say that I think it turned out well. My brief was that Ngaire (the recipient and who lives in New Zealand) loves knitting, enjoys crosswords and is very lucky at winning raffles. So my card tries to reflect these things.

Here it is: I placed the photos I took onto a Blue Background so you can see it a little better.

It is a Starfold card. I was greatly inspired by a Blog I came across by Mio Linden and thought I would have a go at making it. You might need to translate the page as it is originally Swedish I think.
The link to Mio's Blog is: http://bellamios.blogspot.com.au/2011/03/ny-kortvikning.html

My first attempt will be posted in a while as the recipient may well look at this Blog and I don't want to spoil the surprise. The card base was cut to 45cms ( I think in the original Mio cut her example to 30cms). I used a big sheet of card that I purchased at Office works as 12 x 12 papers were not big enough for the additional size. The finished card measures approx: 23cms (9 inches) from point to point of the star.

I have taken a lot of pictures, the quality is not great but it will give you a closer look.
Here they are:


This is the back of her card and I made a Crossword based on the information I was provided. This is a free program I came across on the web - https://crosswordlabs.com/

This little web based program is very simple to use and you enter your own clues and the word you want to appear in the Crossword. It produces a PDF of the final version (also one with all the answers in case you forget them!!!) after you have chosen how you want your Crossword to look or be configured.


As you start to open the card you begin to see the inside.


Here is the card fully opened up. I have taken more close up photos of the flaps so you can see the detail a little better.


The Photo is not Great but it provide the first of the Close up views.


I was really pleased with my little bit of creativity here. I was told that Ngaire loves knitting; so I used two wooden toothpicks and a length of Bakers Twine to do a little knitting and added this to one of the inside "Flaps".
The stamp is from JustRite stampers (Botanical Medallions and Banners), I'll reference it in the ingredients list below.
I made a hole at the top of the card on one of the flaps and threaded through some ribbon from my stash and added a bow of the same ribbon.


On one of the other "Flaps" I added some pictures of Raffle Tickets and a Sterling Silver Lucky Horse shoe charm attached with a length of ribbon.

I was really stoked with the flowers too, I have a close up of these coming up.


I added some Stickers and Embellishments that I had in my stash. I think I bought these at Spotlight (Store here in Australia).


At the centre of the card I added a stamped medallion (Just Rite Stampers again - "Butterfly Garden Set"). I stamped it with a Memento Rich Cocoa ink pad and then fussy cut it out. I coloured the edges with two Ranger /Tim Holtz ink pads: Vintage Photo and Antique Linen.
These were also used on all the edges of the Crafters Block 1 Design Papers adhered to the base card.


The Butterflies are from a Sizzix/Hero Arts set of stamps and Dies, all stamped using Memento Rich Cocoa ink Pads. I added Stickles "Crystal" to some to give a little sparkle!


These lovely paper roses are from Wild Orchid Crafts and a first time attempt at using these types of flowers and I think they look stunning. I cut their wire stems, wrapped them around a pen and added these twirls for dimension to the three flowers. Cute huh?


OK you may be getting Photo Overload now, so this is the last photo of the card. A handy Gold Peel Off (80) and another of those butterflies which once stamped I die cut out using the matching dies in the set.

The sentiment is from a set of stamps from Papercraft called Celebrations J6423-06.


Here are the details of the ingredients I used:


I hope you liked the card. I certainly enjoyed making it.
Until next time take care and be safe.


Thursday, 18 October 2012

Santa "In the Round"

Hello again, How are you?
Today I have two Christmas cards to show you. It is one design but each card I am showing you has a subtle difference. I was inspired by an image I saw on Pinterest (via Waltzing Mouse Stamps - I think???) and thought I'd have a go at making it.
Here they are:

I have placed this image onto a Blue Background so you can see the scalloped edge of the card.


I have placed this image onto a Green Background so you can see the scalloped edge of the card.


You'd be right to think "so is that the subtle difference?"...no this isn't the subtle difference - it is the shape of the tags that is different!

The red "Merry Christmas" ribbon I bought at Spotlight.


Here's a more detailed list of the ingredients I used to make this card:


Thanks for stopping by to see my cards. Hope you like them.
Until next time stay well and be safe.


Related Posts Plugin for WordPress, Blogger...