Showing posts with label Echo Park Papers. Show all posts

Sunday, 28 June 2015

2 Tri-fold Birthday Cards

Hello my blogging family and friends, I hope you are well. My my how time has F-L-O-W-N where does it go, I think there must be a TIME BANDIT who sneaks up unawares and takes a few minutes here and a few minutes there!

I have been in my craft room pottering, I have created a Laura Denison model - I'll show you when I have some photos - it has come out really well. A surprise for another time.

Today I have two cards that are both tri-fold cards to show you, here's:

CARD 1


Here is the front of my card when it is all folded together.

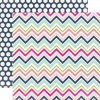
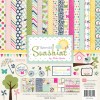
All the papers are from Echo Park - Sunshine Collection.


Here is the card opened up, I really like this style of card, once the cut and scoring is done, then the panels fold.


Here is a "helicopter" view of the opened card.


I just  love these wooden buttons - I have been holding onto them for a while 'cos I love them so much, then I thought this was crazy and that I should use them - so here they are - with a little black hemp string creating a bow on top.


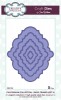
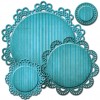
Here is the central medallion made with scraps of card stock but using the Spellbinders Circle Delight dies.


CARD 2


Here's the front of my second card.
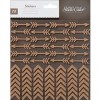
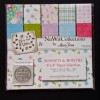
The papers are American Craft - Lucky charm collection.


Here is the card opened up, I cut out little butterflies from the reverse of the Echo Park papers to add as embellishments on this card.


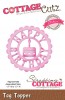
Here is the second medallion, the central die is from Cottage Cutz.


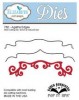
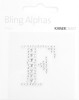
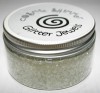
The main ingredients that I used to make these cards:


So there you have it, two cards made using the tri-fold technique ..... Thanks for stopping by to read today's post ...

Sunday, 15 February 2015

It's been a while .... December 2014 and Frits' Birthday

Hello again my blogging family and friends. I didn't mean to drop off the face of the planet for however many weeks it has been, it just worked out that way. So much to do and so much to tell.
I will pick up where I left off in telling you more about our December 2014 trip.

I will admit to being desolated when Frits lost his phone with all our photos on it! He wasn't best pleased either, because after all it was his phone and these days they have EVERYTHING in them!
Then to my delight I found a few pictures that I did take and that I honestly thought I'd lost in the transition of files to a new lap top from an old one - which found a good home with my niece Abigail.
I also have a card that I made for Frits' Birthday to show you as well.

So if you are seated comfortably I'll make a start.

I left off in my last post showing you what happened the 2nd - 3rd December. Well I'll pick up there and show you a few images of New York. We were there 4th - 6th December. We stayed at the Nesva hotel and used the subway a lot to get into Manhattan. Here are some pictures.


Here we are outside of Macy's on 5th Avenue, a fantastic store and one I have always loved to visit. The Christmas windows were "Out of this World" quite literally, they all depicted different planets, my photos don't really do them justice - you had to be there to see them in their fill glory, the reflection in the glass limits what you can see.


So there you have it, our New York part of the December trip. Next time I'll show you images of who we saw in Cambridge and what we got up to in London - between the 7th - 10th December.

For now you might want to see a card. I still have some Christmas ones to show  and I'll do that soon, for now I have a Birthday Card I made for Frits' Birthday.

Here you can see the front of the Pop-Up card. I used a Sizzix die to make the medallion. There's more close up pictures with more details coming ...


I'm very fond of the Kaisercraft Rhinestone Alpha Letters they always make an impact and I keep a few in my stash for members of the family to add to their cards when I need them.


When you open the card this is what you see. I extended the Elizabeth Craft Design die to add another step, I needed a little more height on my card and so It was easy to use my knife and ruler to make the bottom step - a little larger. I used a few ECD dies and I'll include them in my ingredients list at the bottom. The base card was a sheet of Bazill that I picked up in Micheals or Joannes when I was in the states recently. The oval shape here on the left is one of the Sue Wilson Californian frame dies. I inked the edges with Vintage Photo distressed ink pad.

More close ups coming up:


I found these really nice silver letters at Spotlight (I also gave them as small Christmas table gifts when we were at my sister Clare's for Christmas - ideal for putting on your i-phone or tablet cover zip etc) at the top you can see I added a little "F". Frits has since taken it off and added it to his USB case. The paper by the way is Echo Park - Splendid Sunshine - Chevron.


Again a better picture showing the Pop-Up feature - you\ll have noticed I also added a little flower at the bottom - I just felt it needed a little something.

... and here is the back of the card ....


And there you have it. I hope your beverage didn't go cold looking at today's post. I know there were also a lot of images so I hope the download time wasn't annoying for you.

Here are the main ingredients I used to make this card:

Thanks for checking in - I appreciate your patience and apologies for taking so long to update my post - perhaps not so long until the next one eh?

Sunday, 17 June 2012

Brisbane Scrapbooking and Papercraft Expo - Part 2

Hi, I hope all is well with you and yours. A cool winters morning here in New South Wales and especially in our little part of it, here in Dorrigo. Sun is out but the wind makes it cool!

As promised here is part 2 of my Brisbane Expo experience.

The images I am going to share are from the third and last class that I took on Sunday 10th June.
In summary I would say that I was a little disappointed with this class. Please don't think I am being a grouch! We were all provided with a pack which included images of the 3 cards we were to make as well as instructions and all the ingredients (which were not too generous I remember thinking!).

Basically we were told to get on with it and if we had questions to ask. When asking about the stamps we were to use we were pointed to a table at the front of the room and that was about as much teaching input that was provided. To be fair the facilitator (as I will now call her) did say it was not her style to guide us through the process "step-by-step" as people, she said, work at different rates. Which is true!

With that said and my mini catharsis over, I and a few others decided to make the most of this time together and enjoy making the 3 cards. Here are the 3 cards I produced.

Card Number ONE:

This card encouraged you to use the technique of tearing. Ideally we were told this was a great way of using up scraps of paper. As this isn't a usual technique for me it was good to give it a try.

The 12 x 12 papers we used were from Echo Park and the set was "Victoria Gardens".

The supplies were provided by Craft Queen Australia.


Card Number TWO:

This card showed me how to mix and match different types of ribbon and braid. Included is Ric Rac (which I cannot find on their website?) Pink Paper ribbon, elastic lace, rosette ribbon, gingham and seam binding.

I really like the pearl ribbon, great for the centres of hand made flowers I was thinking.
It comes in two sizes in both white and cream.


Card Number THREE:

This card I was the least happiest with, in part because we ran out of ingredient particularly the Green gingham.

I have since shortened the bunting flags so you don't see the spaces.


I show below what I can find on their site at Craft Queen Australia and alternative supplies for other ingredients for this post:


I hope you got a bit of inspiration from these cards. I took several lessons form my class.
- Try something different - get out of the comfort zone
- Use left overs in your stash to great effect
- It's lovely to meet and sit with other crafters as we all seem to giggle and have a great deal of fun!

Thanks for popping back in today. I have some other cards made up so I will start to share those as well.


Related Posts Plugin for WordPress, Blogger...