Showing posts with label EK Success. Show all posts

Monday, 24 June 2013

Harrison's 11th Birthday

G'day my blogging family & friends. I do hope you have been keeping well since my last post which was a little while ago - my apologies. My days just recently have seemed to go so quickly and here we are at the 24th June already! It is very much the winter season here in New South Wales with cool mornings and cold nights.

I have just got back from a lovely weekend in Sydney. We went to see Cate Blanchett in the Sydney Theater Production of "The Maids". You will of course know her if you have watched any of the films from the "Lord of the Rings" trilogy as well as any of the heap of other movies she has been in. We were thrilled to see her in a live show.

We also went to see Harrison and Marley our grandchildren. Harry turned 11 on June 20th so it was so nice to be able to drop in and give him his present and his card - the subject of this blog post, rather than have to post it to him. We saw Marley play netball and score a GREAT goal for her team; unfortunately they lost the match but she shot a GREAT goal!!!

Lastly we went to see "World War Z" with Brad Pitt starring. it was very suspenseful and I had to apologise to the person sitting next to me (the Cinema was packed - VMax screen) for all my additional sound effects of surprise and alarm!
A really splendid weekend which we both enjoyed .....

This time I was able to take photos of Harrison actually opening one of my cards and I have them to show you too!

Here is my card:


I will firstly say a BIG Thank You to Helen Cryer for her inspirational Blog at "The Dining Room Drawers". Her idea was what triggered the making of this card for Harrison.

I used the Sizzix Pop 'N Cuts die to make this card. The base card was made using Kaisercraft Bluebell weave card stock.

The sentiments I created on my PC using Word Art and cut them out and used my Copic W3 to add some shading.

The Gears are from Kaisercraft Wooden Flourishes - Cogs.


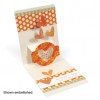
When the card is opened you see the Pop Up Feature.
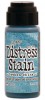
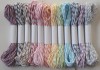
I used my Hero Arts Clouds Stamp and Blue Ranger Distressed ink stains. I used a wooden star that I have had in my stash forever with some yellow and white Bakers Twine from Really Reasonable Ribbon.
Again I made Harrison's name on my PC and fussy cut it out.


The white clouds at the top of the card I drew and fussy cut out. The Medallion saying 11 Today, was made using a couple of circle punches and some 'Peel offs'.
The plane was an image I found on Google images and then drew it myself, fussy cut it out and coloured it with my Copics.
I used a Just Rite Stamp for the message.


The fantastic paper is from Mel Stampz's Designs. It is a fabulous Free resource.I found it here Click on the word "here" to access the URL.


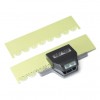
This is the back of the card. I made the writing panel from a piece of white card stock stamped with the Hero Arts Stamp and punched on the top and bottom edges with an EK Success Abstract flower edger punch.


 ... and here is the Birthday Boy opening this card with one of his friends watching on.


... and here is this card being opened for the first time! It was a great hit!


I think the real hit was the gift the paper didn't last too long!!


The main ingredients used to make this card:


Thanks for stopping by and reading my post for today


Thursday, 10 January 2013

A card for Joan

Hi, how are you? Thanks so much for those of you concerned about me after hearing of the terrible bush fires we have been experiencing in NSW here in Australia. We are officially having a heat wave which for Australia means it's REALLY hot! We have had the highest average temperature for this continent since records began. Here in NSW temperature have reached above 42 degrees and this means that fires can ignite when lightening strikes, which has been the case. There have also been incidents when really silly juveniles have started fires deliberately; lives are at stake and I am glad the authorities are throwing the law books at these culprits. We are both fine, we had a small fire up the road which was put out overnight by rainfall.

Today I have a card to show you. It was commissioned for a lady called Joan.


As you can see it was for her 70th Birthday.
I used some of my Spellbinders dies, some lace, flowers, pearls and some Lovely alphabet tiles that Clare kindly gave me.
The paper is from HOTP from my stash.


It is a pop-up card. I had a very clear brief for this card which I was grateful for.

Joan, at one time was/is a teacher (teaching English now) and loves books; so books were to feature in her card. I used images of books (from Google) and added them to the columns each side of the pop-up.


I used an EK success punch to create the feature across the top (and the bottom) of the card. I found a lovely quote on the Internet and added that as part of the central panel on the top of the card. I also added a couple of flower stickers from my stash either side of the sentiment.

On the "steps" of the pop-up I added more alphabetical tiles spelling out "Happy Birthday". At the side edges you can see Pearl Ribbon added to provide a little bling.


Looking down on the card you get a better view of the other things I added to the card - notably some Really Reasonable Polka Dot ribbon, another sticker (I think this was a K & Company sticker I still had in my stash).


On the back of the card I added another verse which I thought appropriate - again from the Internet.


There you have it. I do have a video of this card. I need to give you a warning though - I filmed it upside down!!!!!! How, well I used our new camera which works differently to our old one and I treated it like our old one - and the result - well it's upside down - what a nit wit!
If you can bear it, it's here for you to see....


See what I mean! Even the Thumbnail is upside down!!! Oh well! lessons learnt. There is one more video (I think) that I filmed this way, however I'll give you fair warning before I link you to it!


Here are some of the ingredients I used to make Joan's card:

InLinkz

Thanks for stopping by today. I hope you like my card for Joan.


Saturday, 11 August 2012

A Locket of Love on your Birthday

Hi there "Blog Family and Friends". How are you? As some of you may know we are on our travels overseas with work and before I left Australia I made a few cards and kept them aside so I could add them to my blog whilst I was away. Work is going well, but I must say I do miss not being able to tuck myself away and do a little crafting. So the ability to share a card with you enables me to not miss it sooooo much!


Let me show you the card I wish to share with you today.

To make this card I used Gold coloured card stock from DCWV neutrals stack pack for my card base. The card if I recall is approximately 5" x 7".

On top of the card base I layered Teal plain and patterned Design Paper from a HOTP Paper Pack.

The interesting design for the layer with the pattern on it was cut with more Gold coloured card stock using an EK Success "Scroll Pattern Edger Large Punch (54-50052).

I am very grateful to Becca Feeken at Amazing Paper Grace for the inspiration on how to use this punch. It was her design that inspired me to make this card with this particular punch. I had it in my stash for sometime and was unsure how to get the best from it. Becca has a Tutorial on her Blog (and on YouTube) on how to create this look.


After adding another couple of layers of the teal plain and patterned papers again I used satin ribbon from Really Reasonable Ribbon's March 2012 subscription pack. These are such good value and you get such great ribbons that you may never think of buying but are just lovely to use.

In addition I used a thin piece of gold ribbon from my stash to attach the lovely silver locket that I purchased at Spotlight in Australia. (Spotlight really do have some great crafty items).

I finished off my card with a silver "Happy Birthday" peel off and a couple of pieces of Teal candi.

Here are some better details of the items I used:

I hope you liked this card, it is quite simple and yet very effective. I think it is the perfect place for this beautiful silver locket.
Thanks for dropping by to read my Blog. I'll be back with another card quite soon. Until then be safe and take care.


Sunday, 13 May 2012

This one is for you Clare!

I cannot believe that I have created my own blog; and all by myself too! The difficulty it seems was in my head. I made the discovery that once you get started, it is a pretty logical process and that you can always change and update how it looks later.

I decided to begin my blogging Journey with a couple of "Z" fold cards that I created this week. I was inspired by a Tutorial from Cheryl which can be found on YouTube here.

Please forgive the photography I took the pictures on the Dining Room Table and one or two maybe a little out of focus. Early days and room for improvement I think!

OK. My first card was my first X card ever.


 This is the front of the card fully extended. I used Black 12" x 12" card stock for my card base and Jacie's Vintage 12" x 12" Papers from HOTP for the matting and layering.


The front panel uses a Doily that I picked up at my local Coffee Shop, which I threaded with a thin piece of ribbon (from my stash) in addition a bow from  Bella! Ribbon Bowz that was in a pack of 10 and on Sale.


The Middle panel I decorated with a Dress, Hat and Bag made using a very old Template I have, which I covered in black card and then decorated with some pink flowers cut from a piece of tape from my stash.


For the last panel I used a Memory Box Die - La Rue Heart on a piece of Pink card stock, a pewter embellishment (from my stash) a Pink Flower (from Spotlight) a sentiment panel from WISHMADE 3D Stickers found at www.craftybitz.co.uk.


Nice view of the table huh!
This is the back of the card showing the secret writing panel which fits inside the very last panel which is in fact a pocket!
The dies used on the back middle panel are Memory Box - are the two sizes of the Tilda Swirl die.
The metal gardening can embellishment is from my stash and another of those bows from Bella!


My second version of the same style of card is in Blue!


I did mention that I was a Spellbinders Fan right? Well this card is loaded with them.
This picture shows the front of the card opened and extended. I used light blue 12" x 12" card stock for my card base and Jacie's Vintage 12" x 12" Papers from HOTP for the matting and layering.


This shows the first panel which I decorated with a layered medallion using dark Navy blue and white card stock. The Spellbinders Fleur De Lis Pendants (S4 - 204)  die was used to create this medallion.
The white layer of the medallion is made with a Martha Stewart Garden Trellis Punch - Thanks to Jak Heath for that bit of inspiration!
A pearl brad and a piece of ribbon from my stash finished off this front panel.


This middle panel uses Spellbinders Heart Circles (S4 - 316) and Lotus Pendant (S4 - 269) dies. The centre piece was a Bead Fnding and flat pearl (from Zacco Beads).


The last panel was made using Spellbinders Moroccan Motif  Dies (S5 - 065).
I used a white Peel Off to make the Happy Birthday sentiment, matting it on a piece of the same dark navy blue card stock that I had used.


This image shows the back of the card extended out and I have taken out the secret writing panel so that you can see the pocket in the last panel in which it sits.


This is the last image of my Z cards showing the secret writing panel in more detail. The ribbon rosette is made from blue seam binding again Cheryl's Tutorial shows how this is done. In the centre a bead finding with a white resin rose in the middle from Zacco Beads.


Thanks for having a look at my very first blog. I need to go and sit down now!
I guess the learning that I have received today is this quote I often use when teaching presentation skills, "Fear Knocked, Courage answered and there was on no one there!" Meaning you don't know you can until you try!

Related Posts Plugin for WordPress, Blogger...