Hello there, how are you my blogging family and friends. The weather is certainly working its way towards winter here in Australia. It's getting very cool here in Dorrigo.Winter officially begins on June 1st.
Today I have a Wedding card to show you. I was asked to create it for a couple who live in Canada, although the groom is Australian.
I took lots of pictures of the card and will show them as part of today's post.
Here we go:

I was hugely inspired by a card I saw Sue Wilson make using her Eternal Rings striplet die. I used the die three times over and once done I just went banana's with pearls - I think the card called out for them. I also paper pierced the edges of the matted layer of the card, and then covered the centre of the matting card stock with a piece of Elizabeth Craft Design double sided sticky paper which I sprinkled with Cosmic Shimmer "Iced snow" and then burnished into the cardstock to ensure it adhered to it. The piece of lace is beautiful, it was a piece I bought when I was in Holland.

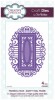
The central medallion was made, again using Sue Wilson dies - I'll add their names to the ingredients list below, I cut the dies out and overlaid them together. The Congratulations sentiment is a gold rub-on.

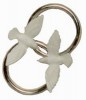
Here's a close up of the top left corner of the card. The Double Wedding rings with the doves on were from a wedding cake decorating shop.

On the lower right on the card I added a lovely little sterling silver embellishment of two little Bells - so pretty.

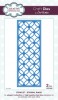
Here is the inside of the card. (opps I have just noticed the photo is upside down as the initials are the wrong side up - apologies!) and for the inside of this card I used more Sue Wilson dies - the Austrian background die and heart lattice striplet die. The silver and white card I bought from OfficeWorks.

The central panel I cut and folded in such a way that when the card opened, the central panel moved forwards. I used the same silver and white card stock behind it.

Here is a close up of one of the side panels, I used a strip of silver to cover the join between the white cardstock and the patterned cardstock.

Here is the back of the card, I added a tiny little charm with a heart in an envelope.
I knew that the card would be shipped to Canada, so it would need a little protection. Hence I made a light card envelope.

Pretty boring picture but you get the gist! I added a Spellbinders die cut out as the writing panel of the envelope.

Flap at the top and a wedding bells peel off at the bottom.

Here the card is again on top of the envelope.
Here are the main ingredients I used to make this card:
Thanks for stopping by to read today's post, have a GREAT weekend everyone

Today I have a Wedding card to show you. I was asked to create it for a couple who live in Canada, although the groom is Australian.
I took lots of pictures of the card and will show them as part of today's post.
Here we go:

I was hugely inspired by a card I saw Sue Wilson make using her Eternal Rings striplet die. I used the die three times over and once done I just went banana's with pearls - I think the card called out for them. I also paper pierced the edges of the matted layer of the card, and then covered the centre of the matting card stock with a piece of Elizabeth Craft Design double sided sticky paper which I sprinkled with Cosmic Shimmer "Iced snow" and then burnished into the cardstock to ensure it adhered to it. The piece of lace is beautiful, it was a piece I bought when I was in Holland.

The central medallion was made, again using Sue Wilson dies - I'll add their names to the ingredients list below, I cut the dies out and overlaid them together. The Congratulations sentiment is a gold rub-on.

Here's a close up of the top left corner of the card. The Double Wedding rings with the doves on were from a wedding cake decorating shop.

On the lower right on the card I added a lovely little sterling silver embellishment of two little Bells - so pretty.

Here is the inside of the card. (opps I have just noticed the photo is upside down as the initials are the wrong side up - apologies!) and for the inside of this card I used more Sue Wilson dies - the Austrian background die and heart lattice striplet die. The silver and white card I bought from OfficeWorks.

The central panel I cut and folded in such a way that when the card opened, the central panel moved forwards. I used the same silver and white card stock behind it.

Here is a close up of one of the side panels, I used a strip of silver to cover the join between the white cardstock and the patterned cardstock.

Here is the back of the card, I added a tiny little charm with a heart in an envelope.
I knew that the card would be shipped to Canada, so it would need a little protection. Hence I made a light card envelope.

Pretty boring picture but you get the gist! I added a Spellbinders die cut out as the writing panel of the envelope.

Flap at the top and a wedding bells peel off at the bottom.

Here the card is again on top of the envelope.
Here are the main ingredients I used to make this card:
 |  |  |  | |
 |  |  |  | |
 |  |
Thanks for stopping by to read today's post, have a GREAT weekend everyone