
Hi my blogging friends how are you? Not long until the big fellah makes his world trip - so the big questions is about Naughty or Nice right??? OK we won't go there!
I have two cards to show you today and I must say right up front that my inspiration came from Chris Peterson on her Calla Lily Blog. She has made many versions of these cards and and they are really worth taking a look at. I'll include the links later on in my posting. I have some photos as well as a video clip to show you.
Let's begin with my Christmas card - you will see Chris' influence here and this was a great confidence booster for my first attempt.

Here is the card all folded ready for posting - it fold almost flat.
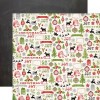
The paper I used is from Echo Park, their "Tis the Season" Collection. I inked the edges with Vintage Photo distress ink.
I used an A4 sheet of red card stock that I had in my stash.

This is the back of the card. I used a sheet from the 6.5 inch Kaisercraft St Nicholas Paper Pad and then fussy cut out a white panel and used my corner chomper to tidy the corners.

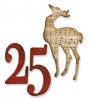
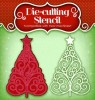
Here is the card opened up. I used a variety of dies for the trees and deer, see the ingredients below. I used a little of crystal Stickles to give it a little sparkle.
The star I hand drew and fussy cut out.

A view from the top. You can see the "Bridges" which create the perception of the layers on the card. All the instructions are on Monica's You Tube video (see below).

Please forgive the background mess which is my crafting table, it was the best way I could show you the card as it is meant to be placed.
OK next is a Birthday Card with a strong Australian influence (as requested by the person who asked me to make the card for her Mum).

Here is the card all folded ready to post. I used a piece of 12 x 12 Kaisercraft Tangerine weave card stock as the base. The Design paper has no name on it and I have had it for ages so I don't know what it is or where I got it sorry!
Again all inked with Vintage Photo ink pad.
The bakers twine is from Really Reasonable Ribbon.

The back of the card with an image of one of the Waterfalls near us at Danger Falls.

Here is the die on view of the opened card. I used Jolees Boutique Australian Stickers plus a few images I printed and fussy cut out from Google e.g. Cockatoo, King parrot, kangaroo etc.
I used "peel offs" for the Sentiment.

The helicopter view as I call it - just so you can see the bridges. I used three on both of my cards. I think the instructions suggest using two. You can use as many as you like.

.... and another view of my untidy craft desk, you do get to see all the bits and pieces in a more close up way though!!
I loved the Thongs - they had an image of the waterfall on them that is close by to us.
I also did a video, so if you'd like a different perspective of the two cards click on the image below:
Here are all the links to those people who inspired me with all the instructions and measurements etc.
Chris was inspired by Monica Gale who includes a great video giving instructions on how to make these cards. Her measurements are in cms so if you like metric this is the place for you.
http://monicas-passions.blogspot.com.au/2013/10/card-in-box-video-tutorial.html
Chris includes her measurements in Imperial on her blog here:
http://www.callalilystudioblog.blogspot.com.au/2013/11/card-in-box.html
She has a few posts on her blog showing the different cards she has made using this folding technique so take a look for lots of inspiration - particularly for Christmas Cards (next year!!??).
Here are the main ingredients that I used to make these cards:
Thanks for stopping by today and reading my blog. I hope you like the cards. If you fancy making them yourself pop over to Monica's and Chris' Blogs.

I have two cards to show you today and I must say right up front that my inspiration came from Chris Peterson on her Calla Lily Blog. She has made many versions of these cards and and they are really worth taking a look at. I'll include the links later on in my posting. I have some photos as well as a video clip to show you.
Let's begin with my Christmas card - you will see Chris' influence here and this was a great confidence booster for my first attempt.

Here is the card all folded ready for posting - it fold almost flat.
The paper I used is from Echo Park, their "Tis the Season" Collection. I inked the edges with Vintage Photo distress ink.
I used an A4 sheet of red card stock that I had in my stash.

This is the back of the card. I used a sheet from the 6.5 inch Kaisercraft St Nicholas Paper Pad and then fussy cut out a white panel and used my corner chomper to tidy the corners.

Here is the card opened up. I used a variety of dies for the trees and deer, see the ingredients below. I used a little of crystal Stickles to give it a little sparkle.
The star I hand drew and fussy cut out.

A view from the top. You can see the "Bridges" which create the perception of the layers on the card. All the instructions are on Monica's You Tube video (see below).

Please forgive the background mess which is my crafting table, it was the best way I could show you the card as it is meant to be placed.
OK next is a Birthday Card with a strong Australian influence (as requested by the person who asked me to make the card for her Mum).

Here is the card all folded ready to post. I used a piece of 12 x 12 Kaisercraft Tangerine weave card stock as the base. The Design paper has no name on it and I have had it for ages so I don't know what it is or where I got it sorry!
Again all inked with Vintage Photo ink pad.
The bakers twine is from Really Reasonable Ribbon.

The back of the card with an image of one of the Waterfalls near us at Danger Falls.

Here is the die on view of the opened card. I used Jolees Boutique Australian Stickers plus a few images I printed and fussy cut out from Google e.g. Cockatoo, King parrot, kangaroo etc.
I used "peel offs" for the Sentiment.

The helicopter view as I call it - just so you can see the bridges. I used three on both of my cards. I think the instructions suggest using two. You can use as many as you like.

.... and another view of my untidy craft desk, you do get to see all the bits and pieces in a more close up way though!!
I loved the Thongs - they had an image of the waterfall on them that is close by to us.
I also did a video, so if you'd like a different perspective of the two cards click on the image below:
Here are all the links to those people who inspired me with all the instructions and measurements etc.
Chris was inspired by Monica Gale who includes a great video giving instructions on how to make these cards. Her measurements are in cms so if you like metric this is the place for you.
http://monicas-passions.blogspot.com.au/2013/10/card-in-box-video-tutorial.html
Chris includes her measurements in Imperial on her blog here:
http://www.callalilystudioblog.blogspot.com.au/2013/11/card-in-box.html
She has a few posts on her blog showing the different cards she has made using this folding technique so take a look for lots of inspiration - particularly for Christmas Cards (next year!!??).
Here are the main ingredients that I used to make these cards:


Thanks for stopping by today and reading my blog. I hope you like the cards. If you fancy making them yourself pop over to Monica's and Chris' Blogs.


