Hello. How are you today? Didn't manage to make it yesterday regards posting about the birthday card for my father- so today is the day.
This card was HUGELY inspired by Sue Wilson and a technique she shared called Bargello. You can see her instructional video below:
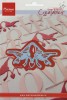
It's a little fiddly but worth the work and I was in desperate need of some inspiration and thought I would have a go, the card I am sharing today is the result.

With it I made an Elizabeth Craft Designs Easel to stand the card up in, I used silver mirror card and embossed it with the same folder I used for the card. All details below as usual in the ingredients list.
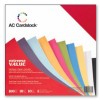
I used a mixture of Kaisercraft and American Crafts weave cardstock papers which I cut into one inch strips and then squares, as shown by Sue in her video. I used the embossing folder shown in the ingredients list below.
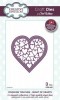
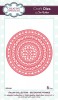
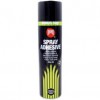
 OK! Huge lessons learnt here. I die cut 3 of the dies shape and sprayed with adhesive to glue them together - so far so good.
Then I spray glued the top one and sprinkled glitter on it and it all went furry! Yikes.
Next time I'll find another way to add the glitter - not with spray adhesive!

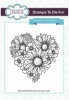
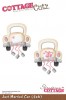
The flowers were easy to make just gluing them together using scraps and cut offs from making the background of the card.
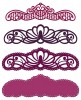
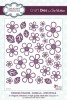
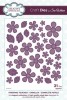
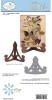
These are the Open and complete Camellia dies from Sue Wilson.
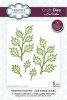
The details for the leaves are in the ingredients as offhand I cannot remember their name.
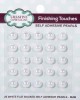
I used Prills, adding them to the centre of the flowers and a little blue Tulle.

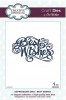
I used the Quickutz English Rose Alphabet set to create the letters for the front of the card in silver mirror card.

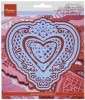
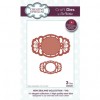
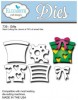
... and here's the Easel Stand again - SO easy to make, I die cut one in silver mirror card and one in cardstock, adhered them together and then ran the complete thing through the Grand Calibur with a Sue Wilson A4 Embossing folder (again details below).

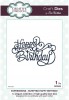
On the inside a couple more Sue Wilson dies. The ECD gift was added to cover a little boo boo I made trying to lift the side strip.
It's correct the 5 second rule works anything after that and things stick REAL well!
.......... and that's my card. It is winging its way to the UK now and hopefully will arrive either just before or on the date required!! Cross fingers!!
Here are the main ingredients that I used to make this card:
Thanks for stopping by today to look at this card. I hope you like it!

This card was HUGELY inspired by Sue Wilson and a technique she shared called Bargello. You can see her instructional video below:
It's a little fiddly but worth the work and I was in desperate need of some inspiration and thought I would have a go, the card I am sharing today is the result.

With it I made an Elizabeth Craft Designs Easel to stand the card up in, I used silver mirror card and embossed it with the same folder I used for the card. All details below as usual in the ingredients list.
I used a mixture of Kaisercraft and American Crafts weave cardstock papers which I cut into one inch strips and then squares, as shown by Sue in her video. I used the embossing folder shown in the ingredients list below.

Then I spray glued the top one and sprinkled glitter on it and it all went furry! Yikes.
Next time I'll find another way to add the glitter - not with spray adhesive!

The flowers were easy to make just gluing them together using scraps and cut offs from making the background of the card.
These are the Open and complete Camellia dies from Sue Wilson.
The details for the leaves are in the ingredients as offhand I cannot remember their name.
I used Prills, adding them to the centre of the flowers and a little blue Tulle.

I used the Quickutz English Rose Alphabet set to create the letters for the front of the card in silver mirror card.

... and here's the Easel Stand again - SO easy to make, I die cut one in silver mirror card and one in cardstock, adhered them together and then ran the complete thing through the Grand Calibur with a Sue Wilson A4 Embossing folder (again details below).

On the inside a couple more Sue Wilson dies. The ECD gift was added to cover a little boo boo I made trying to lift the side strip.
It's correct the 5 second rule works anything after that and things stick REAL well!
.......... and that's my card. It is winging its way to the UK now and hopefully will arrive either just before or on the date required!! Cross fingers!!
Here are the main ingredients that I used to make this card:
 |  |  |  | |
 |  |  |  |  |
 |  |  |  |  |
 |  |  |
Thanks for stopping by today to look at this card. I hope you like it!