
Hello and Thanks so much for stopping by again to see what I have been up to.

Amanda is a Graphic Designer (No pressure then !!)
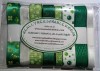
The main Theme was Peacock Feathers and colours - here's the Brand of her Wedding.


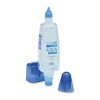
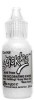
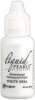
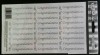
Here are the main ingredients I used to make this card:


First off .... an update on the Markets that I talked about in yesterdays' Blog. In two words "A Disaster". I choose to look for lots of gold nuggets from today (even as I have to dig deep for them!). All was going well, we arrived at 6.20am and lined up the car with others waiting to get into the Showground (as instructed) to put up their stall and display their wares. We were relieved to be where we were instructed to be ... that was until the Gate Marshall said that we were at the wrong gate and needed to be somewhere else. OK we had time on our side. The instructions were, if you are not at the gate by 7.15am you lose your stall space. So we went to this somewhere else - another gate. We joined the queue and waited with others to get in - only then to be told by the Marshall ... yes you've guessed it .... that we were at the wrong gate and needed to be at the place we first were!
By this time we had lost our sense of humour!!!! Time was now cracking on as it was nearly 7.00am. So one of the other Marshalls at this gate said he would find us a space - all be it not the one we had been allocated .... BIG MISTAKE by us, for taking this seemingly kind offer. We were put in a space where very few people came by .... it was a nightmare. I complained (of course!) and eventually my displeasure was noted and accepted (???? remains to be seen!!!!). We did take a look at the space we were supposed to have been and it would have been so much better. However, through no fault of our own we ended up hopelessly positioned. I was told to ring again (we need to ring VERY early on the Monday before the Saturday of the market, so this one was held today the 20th so I called on Monday 15th) and something would be done. Well I'll keep you posted on that score.
OK - I have had my mini catharsis and cooled down - Thank You for letting me rant ....
Now to a card. It was commissioned by my good friend and neighbour. It was for her nephew Blake who was getting married to Amanda at the end of March in Canada. The card would be hand delivered as my friend and her husband were making a trip over their as part of their travels.

Amanda is a Graphic Designer (No pressure then !!)
The main Theme was Peacock Feathers and colours - here's the Brand of her Wedding.

This was the invite sent to to those going to the wedding. The lace and double ribbon was what was wrapped around the envelope. These were my Clues.
My brief was to make a card that was original, different and would have the same colours on it.

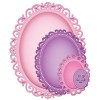
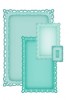
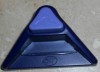
... and here's my card. I decided to make it a Gatefold card (open outwards from the centre. I found some Kaisercraft Design Paper and Moss Green card stock. I used some Quill cream card stock as the card base cut with a Spellbinders Romantic Rectangles, Floral Ovals and Classic oval Dies.

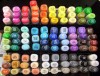
I found some similar Ribbon and Seam Binding to that used on the invite as well as some cream lace in my stash. I layered the Design paper onto the cream base and added the ribbon (and pearls). I hand drew a similar Peacock feather on white card using some Marvy markers that I have, fussy cut it out and stuck it to the ribbon.
I then cut out the cream oval piece using Spellbinders Floral Ovals, a Green piece of cardstock with a Spellbinders classic oval die which I layered together using 3D foam pads. On top of that a Silver Wedding Peel-off.

When you open the card you see this. I hand drew a peacock feather using my Copic pens and overlaid it with some Stickles Crystal glitter - which actually takes on the hue of the colour of what you add it too.

Here you see the whole gatefold card opened fully. On the inside of the sides I added the names of the couple which I created on my computer, then printed and fussy cut out. I then added some white peal liquid pearls. NOTE: Unfortunately the TRUE colour is not shown here as my camera has changed it a tad!

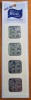
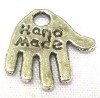
I decided to add some detail to the back of the card.

I added a little silver charm on the back which says "Hand made"

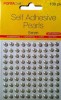
Even the envelope got some additional attention too. I added a foil sticker and rounded the corners with creative Memories scalloped corner punch.
... the couple I am told loved their card and Amanda particularly said she spent time examining it. I was delighted especially coming from a Graphic Designer too!!
Here are the main ingredients I used to make this card:
Thanks for stopping by (and allowing my rant!!!) and seeing what I have been up to, if you'd like to leave a comment please click on the pencil in the comments section below - Thanks and ...


