Showing posts with label Tim Holtz Distressed Ink Pads. Show all posts

Wednesday, 13 July 2016

A bright Square Happy Birthday Card

Hello! I hope you are having/or have had a great day!

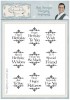
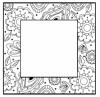
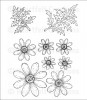
I have a card to show you today which at its centre has a great Zentangle-type stamp from Sue Wilson, at its heart. I coloured it using a range of Tim Holtz Distressed Marker coloured pens.

Here's my card:


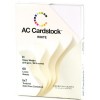
I used American Crafts white card stock - You may have spotted that I use this quite a bit!!! Having stamped the Zentangled Stamp and coloured it with Distress inks and a water brush. I cut it out using a small Double Pierced square die and I matted this image onto Bubblegum pink card stock.


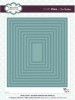
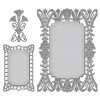
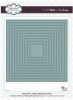
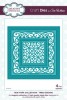
For the centre of the stamp I used the New York Times square centre die in black and in pink I used the inner frame die.

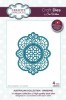
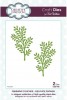
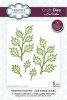
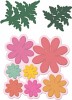
I then cut some leaves using the Sue Wilson Laced Edged Leaves die.


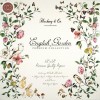
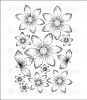
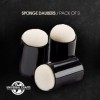
I cut out the Heartfelt Creations Delightful Daisies and heat embossed them with white embossed powder. Then I coloured the white card stock with Memento Lavender ink using a dauber.

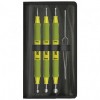
I layered the flowers having shaped them with shaping tools. The leaves I coloured with green distressed inks.


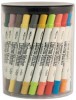
Here are the main ingredients I used to make this card:


Thanks for stopping by today to read my post. I hope you like this card.

Tuesday, 12 July 2016

Happy Birthday - Dream-catcher style card

Hello, How are you today?

A simple card today and one that came together really quickly!

Here it is:


I used American Crafts white card stock as the base for this card.

I first cut the frame using the Sue Wilson Double Pierced Rectangles die.

I layered this on top of a piece of beautiful patterned card stock from the 12 x 12 Hackney & Co, English Garden premium paper pad.

Then I used the Sue Wilson Australian collection - Brisbane die to die cut out of white cardstock the main panel.

I used a fiskar 2inch punch and stamped the sentiment using a Phil Martin stamp for the centre of the Brisbane frame.


I added a flower made with the Heartfelt Creations Sun Kissed Fleur, a piece of Hemp Twine and a few leaves (Delicate Fronds) at the bottom part of the card to hide where I joined the small part of the Spellbinders Astoria Decorative Accents die.

A little bit of blue distressed ink added a little colour with some glitter finished the card off.


Here's what I did with the inside of the card, using another Spellbinders Labels Twenty Die.


Here are the main ingredients that I used to make this card:


Thanks for stopping by today and reading today's post. I hope you liked the card.

Monday, 14 March 2016

A BENDI card for Emelia's Birthday

Hello my Blogging Friends and Family. It seems March is a key birthday month in our family we have about 5 birthdays to celebrate and today's card for little Emelia (my Niece) in Germany is no exception.

Today's card is currently in the post winging its way over to Germany, so I thought I'd share it with you. It is my first BENDI card and I was very inspired by a version of this card on Pinterest and all the instructions were on Splitcoaststampers. CLICK HERE.

Here it is:


It's the first time I have used Flower soft too and it makes the blossom on the trees look very realistic I think.
The grass die is from Cottage Cutz as is the Trio of Deer - in fact I think most of the dies I used to make this card are either Cottage Cutz or Memory Box dies!

I took a few pictures, WARNING this blog is a bit photo heavy.


Close up of the Deer - I dotted them using a white Signo, uni-ball broad nibbed pen. I used a Swiss Dots embossing folder and inked it with an Old Tea distress ink pad. The little birds (Resting Birds) were cut from scraps of paper from my stash and I tucked one of them up into the tree.


Here's the card in side view so you can see how each of the "Arms" on each side of the card are overlapping so that it stands.


This photo looks down on the card and again you can see the structure of the BENDI card a little better.


When you open up the side "Arms" you get to see inside the card - its quite interactive and gives a nice 3D effect. You can see on of the trees on the main inner panel this is the Grand Oak Tree by memory Box and you can just see the swing too.


Here is the inside main panel. You cannot see the clouds to well, I used a Sizzix stamp set (Welcome Home stamp and die set) and used a Memento Pale Blue ink Pad. The bike is also a Memory Box die too.


I just loved the little goat. I made a fence using little lolly sticks and also punched out some leaves to look like bushes under the second tree using pieces of cardstock from my stash. Great way to use up your spare bits and bobs. Isn't the little goat cute? I used a couple of brown/earth coloured Copic markers to give him some definition.


So here is the card opened out fully - it stands well on its own as you train the sides to remain curved.
Pretty huh?

Here are the main ingredients that I used to make this card:


Well, there it all is. I hope you like the card. It's quite easy to put together once you have the gist. The instructions on Splitcoaststampers are Great!
Related Posts Plugin for WordPress, Blogger...