
Hello my blogging friends I hope this post today finds you in good health and spirits. I am on the road to recovery although my right knee is not playing ball at the moment. I was chatting with a great friend who is receiving chemo; we were both in agreement that it is so easy to take good health for granted. This is particularly true when things do not work in the way they are supposed to, it's a great reminder to be so Thankful when they do!!
I have a pretty card to show you today and to make it I used two Digi Stamps from the Pink Cat Studio.


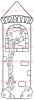
The Digi stamp called "Lily as Rapunzel" was just ideal for the right side of a Tall side (3) step style of card. Once I decided on the size of both the card and the image (Digital Stamps are so easy to re-size) I printed off the image onto a piece of Copic Blending X-Press card stock so that I could colour it later with my Copics. I then attached a piece of the MME Paper Pad to the top of this page and re-printed it. This meant that I could cut up the outline on the card stock as well as the image created onto the Design Paper to add some depth and dimension to the overall look on the card.
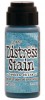
I used the Hero Arts Cloud stamp with some blue distress inks to make the background and cut a piece of green DCWV card stock to create a small hill behind the tower.

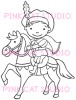
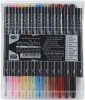
I printed "Billy the Prince" on to Copic Blending X-Press card stock and used my Copics to colour the image.
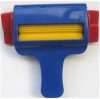
In my stash I found a crimper, so crimped a piece of Brown cardstock which I combined with Grass and Spring Border dies for the last step on the left side of the card.

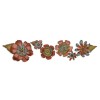
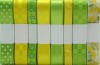
On the middle and bottom steps I added a pretty yellow bow made from Really Reasonable Ribbons. I used scraps of cardstock to make flowers using small brads once I had die cut pieces using the Sizzix decorative strip die.
The sentiment I hand wrote onto a piece of white cardstock cut with one of the smaller Spellbinders Resplendent Rectangle dies.

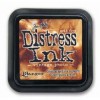
On the back of the card I added a plain white writing panel which I inked at the edges using Vintage Photo ink.
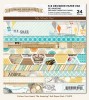
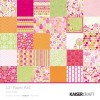
The little flower was cut from a page of the Kaisercraft Sweet Treats 12 x 12 Card stock Pad.
This is such a pretty card and I enjoyed using my Copics to colour in the Digi images.
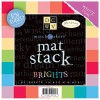
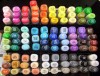
Here are the main ingredients that I used to make this card:


Thanks so much for stopping by to read my Blog today. I have two cards that were commissions to show you. They were quite the creative challenge, each in their own way. The Birthdays are the 1st & 2nd June so I'll post them soon after so as not to spoil any surprise for the recipients.

I have a pretty card to show you today and to make it I used two Digi Stamps from the Pink Cat Studio.


The Digi stamp called "Lily as Rapunzel" was just ideal for the right side of a Tall side (3) step style of card. Once I decided on the size of both the card and the image (Digital Stamps are so easy to re-size) I printed off the image onto a piece of Copic Blending X-Press card stock so that I could colour it later with my Copics. I then attached a piece of the MME Paper Pad to the top of this page and re-printed it. This meant that I could cut up the outline on the card stock as well as the image created onto the Design Paper to add some depth and dimension to the overall look on the card.
I used the Hero Arts Cloud stamp with some blue distress inks to make the background and cut a piece of green DCWV card stock to create a small hill behind the tower.

I printed "Billy the Prince" on to Copic Blending X-Press card stock and used my Copics to colour the image.
In my stash I found a crimper, so crimped a piece of Brown cardstock which I combined with Grass and Spring Border dies for the last step on the left side of the card.

On the middle and bottom steps I added a pretty yellow bow made from Really Reasonable Ribbons. I used scraps of cardstock to make flowers using small brads once I had die cut pieces using the Sizzix decorative strip die.
The sentiment I hand wrote onto a piece of white cardstock cut with one of the smaller Spellbinders Resplendent Rectangle dies.

On the back of the card I added a plain white writing panel which I inked at the edges using Vintage Photo ink.
The little flower was cut from a page of the Kaisercraft Sweet Treats 12 x 12 Card stock Pad.
This is such a pretty card and I enjoyed using my Copics to colour in the Digi images.
Here are the main ingredients that I used to make this card:
Thanks so much for stopping by to read my Blog today. I have two cards that were commissions to show you. They were quite the creative challenge, each in their own way. The Birthdays are the 1st & 2nd June so I'll post them soon after so as not to spoil any surprise for the recipients.


