
Can you believe it - a second post in as many days. I'm obviously on a roll!
I hope this posting finds you well.
Today I have a card to show you. It is a card with a slight difference in as much as I also made a box that protects it and keeps it from getting squashed! I have a video as well as heaps of photos to share with you.
I was asked by Amanda to make a very special birthday card for her mother Norma. The instructions were that it was to be pink to include vintage buttons and vintage dolls. Amanda also asked that I create a side step card. So here is what I made for her ...

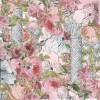
Here is the top of the box. For those of you who like Kaisercraft papers may recognise this as the Lake House collection - the Villa sheet. I particularly love this paper and I felt was a terrific addition to the box. The ribbon is a rose coloured pink, as you can see a vintage colour that really goes well with the paper.
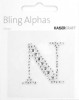
The letter N is one of the Kaisercraft medium 60mm wooden Alphabet letters. I covered the letter with paper from the "Magnolia Grove" 6.5" x 6.5" paper pad and vintage photo distressed ink.

I made the box with Grafix black medium weight 12" x 12" chipboard. The box finished up being 10.75" x 9.75" and 1.25" deep. At the corners of the base of the box I made little embellishments with the striped paper which I made using a corner chomper.

You know we crafters never throw anything away. Well this just proves the case. The inside protective sheet was made from the paper that wrapped flowers that my dearest Fritsy brought me when I was in hospital getting knee replacement surgery. Ahhh!
I had problems keeping the top flap down so I glued a wooden button (from some I bought at the Brisbane Expo) onto it and it worked beautifully. I added to the top of it a little flower punched with a flower Carl C1 punch and a little pearl.

First glimpse of the card inside.

Here is the card laid flat on the table out of the box. The base of the card is made from Kaisercraft liquorice weave card stock, I layered it with Kaisercraft Candy weave card stock. Many of the embellishments were made on my computer, others are from the Kaisercraft range and include: "Sweet Nothings" collectables, a few Dusky pink flowers, a clock flourish, hanging plaque, a few buttons and a brad.

A close up of the left hand panel. I added a hidden tag behind the patterned paper layered on the candy pink card stock.

A close up of the right hand side of the card.

Here is the card standing up and gives you an idea of how it looks out of the box and upright.

Here is the back of the card, I used a Spellbinders majestic labels twenty-five and Damask Accents.
I also managed to make a video clip that shows the card and its box. I must apologise for the wobbles up front. The camera came loose from the tri-pod as the joining mechanism had broken. Next best thing was to do a hand held version so that is what you'll see here.
Finally here is the list of the main ingredients I used to make this card and the box that contains it.
Thanks for stopping by and for reading today's post. Any comments would be particularly appreciated.

I hope this posting finds you well.
Today I have a card to show you. It is a card with a slight difference in as much as I also made a box that protects it and keeps it from getting squashed! I have a video as well as heaps of photos to share with you.
I was asked by Amanda to make a very special birthday card for her mother Norma. The instructions were that it was to be pink to include vintage buttons and vintage dolls. Amanda also asked that I create a side step card. So here is what I made for her ...

Here is the top of the box. For those of you who like Kaisercraft papers may recognise this as the Lake House collection - the Villa sheet. I particularly love this paper and I felt was a terrific addition to the box. The ribbon is a rose coloured pink, as you can see a vintage colour that really goes well with the paper.
The letter N is one of the Kaisercraft medium 60mm wooden Alphabet letters. I covered the letter with paper from the "Magnolia Grove" 6.5" x 6.5" paper pad and vintage photo distressed ink.

I made the box with Grafix black medium weight 12" x 12" chipboard. The box finished up being 10.75" x 9.75" and 1.25" deep. At the corners of the base of the box I made little embellishments with the striped paper which I made using a corner chomper.

You know we crafters never throw anything away. Well this just proves the case. The inside protective sheet was made from the paper that wrapped flowers that my dearest Fritsy brought me when I was in hospital getting knee replacement surgery. Ahhh!
I had problems keeping the top flap down so I glued a wooden button (from some I bought at the Brisbane Expo) onto it and it worked beautifully. I added to the top of it a little flower punched with a flower Carl C1 punch and a little pearl.

First glimpse of the card inside.

Here is the card laid flat on the table out of the box. The base of the card is made from Kaisercraft liquorice weave card stock, I layered it with Kaisercraft Candy weave card stock. Many of the embellishments were made on my computer, others are from the Kaisercraft range and include: "Sweet Nothings" collectables, a few Dusky pink flowers, a clock flourish, hanging plaque, a few buttons and a brad.

A close up of the left hand panel. I added a hidden tag behind the patterned paper layered on the candy pink card stock.

A close up of the right hand side of the card.

Here is the card standing up and gives you an idea of how it looks out of the box and upright.

Here is the back of the card, I used a Spellbinders majestic labels twenty-five and Damask Accents.
I also managed to make a video clip that shows the card and its box. I must apologise for the wobbles up front. The camera came loose from the tri-pod as the joining mechanism had broken. Next best thing was to do a hand held version so that is what you'll see here.
Finally here is the list of the main ingredients I used to make this card and the box that contains it.


Thanks for stopping by and for reading today's post. Any comments would be particularly appreciated.


