
Hello. Thanks for stopping by. I hope you are well and are having a great day. I have a birthday card to show you today. I was asked to make this special card to help celebrate the 100th Birthday of a family member by the person who called me with her request. Her comment was "No presents are allowed and I don't think a Hallmark card will work this time, so could you make me one?".
I was told the recipient of the card likes flowers, lace, ribbons, buttons and anything feminine looking.
Because it is a special card I decided to make a box for it as well. So I have plenty of photos to show you starting from outside the box - to the card inside.

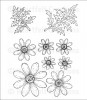
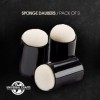
Here is the box, I made it from a sheet of A3 Quill white cardstock. On the top I added a couple of the Stamps and dies from Heartfelt Creations Botanic Orchid Collection, I coloured them with daubers and memento inks.
I used three colours of seam binding ribbon in a red/mauve tone.

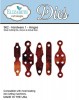
On the sides of the corners I used an Elizabeth Crafts Design Hardware 1 Hinges die using the same cardstock (DCWV Brights Pad) as I used in making the card inside.

Here is a sneak peek view of the card inside!

I was delighted that the box was a perfect size. I made it about .5inch - 1.2cm deep so that the embellishments wouldn't get squashed inside the box.
OK so let's look at this card i more detail....

This is a side step card, it measures 9inches across and is 8inces tall. I actually cheated a little with the three side steps by adding a piece of card stock into the step features so they could be a little deeper in size.

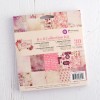
I used a sheet of dark pink card from a DCWV Brights Cardstock 12 x 12 pad. The side panel is 4.5inches wide. I covered all panels with a few sheets of design paper from the Prima 6 x 6 Tales of You & Me Collection Kit.
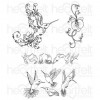
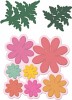
I placed a strip of lace on the far left side of the panel and then added the Tattered Lace BirdHouse Row die cut from cream cardstock, flowers made from Heartfelt Creations Delightful Daisies, Botanic Orchid stamps and dies, coloured with memento ink pads. In between all the flowers I added a mauve seam binding bow.
The two little cards were cut from the Prima paper pad and I also added a white pearl flourish from my stash.

The three steps on the right are 4.5inches wide. On each step I punched out a few strips using a Martha Stewart punch and inked the edges using a Vintage Photo ink pad.
On the first step I added the crystal rhinestones in the shape of 100, I bought these from Spotlight, not sure what the brand was.
The Prima patterned paper had a sheet of sticky letters at the back of the pad and I used these to spell TODAY.
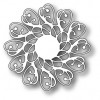
On the second step, I added a Heartfelt diecut from the Timeless Amour die cut in white cardstock. I used a silver peel off onto the pink cardstock and matted in Silver Mirror card from my scraps.
The third step was quite lovely by itself so I just added the Hummingbird and one of the flower images.
I added a Kaisercraft Hanging Plaques wood piece, cut some of the spare cardstock to fill it and placed a silver Peel off inside it. I adhered this plaque to a piece of chipboard covered with silver mirror card stock and stuck inside the card to give it some strength.

Here is the back of the card. I used the Spellbinders Majestic labels twenty five to cut out the writing panel and the verse which I adapted from something I found on google. The little image was from a Kaisercraft Key to My Heart Collectables die cuts. I shaded the die when it was still on the cardstock with Angel Pink memento ink.

Please excuse the untidy background of my crafting table, I wanted to take a photo of the card standing, so you get an idea of the layers. Pretty huh?
..... and there you have it. The card was a pleasure to make - the hardest thing was getting the colour theme and once I had the Prima papers I was off!
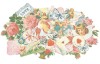
Here are the main ingredients that I used to make this card:
I hope you liked today's card - thanks again for stopping by

I was told the recipient of the card likes flowers, lace, ribbons, buttons and anything feminine looking.
Because it is a special card I decided to make a box for it as well. So I have plenty of photos to show you starting from outside the box - to the card inside.

Here is the box, I made it from a sheet of A3 Quill white cardstock. On the top I added a couple of the Stamps and dies from Heartfelt Creations Botanic Orchid Collection, I coloured them with daubers and memento inks.
I used three colours of seam binding ribbon in a red/mauve tone.

On the sides of the corners I used an Elizabeth Crafts Design Hardware 1 Hinges die using the same cardstock (DCWV Brights Pad) as I used in making the card inside.

Here is a sneak peek view of the card inside!

I was delighted that the box was a perfect size. I made it about .5inch - 1.2cm deep so that the embellishments wouldn't get squashed inside the box.
OK so let's look at this card i more detail....

This is a side step card, it measures 9inches across and is 8inces tall. I actually cheated a little with the three side steps by adding a piece of card stock into the step features so they could be a little deeper in size.

I used a sheet of dark pink card from a DCWV Brights Cardstock 12 x 12 pad. The side panel is 4.5inches wide. I covered all panels with a few sheets of design paper from the Prima 6 x 6 Tales of You & Me Collection Kit.
I placed a strip of lace on the far left side of the panel and then added the Tattered Lace BirdHouse Row die cut from cream cardstock, flowers made from Heartfelt Creations Delightful Daisies, Botanic Orchid stamps and dies, coloured with memento ink pads. In between all the flowers I added a mauve seam binding bow.
The two little cards were cut from the Prima paper pad and I also added a white pearl flourish from my stash.

The three steps on the right are 4.5inches wide. On each step I punched out a few strips using a Martha Stewart punch and inked the edges using a Vintage Photo ink pad.
On the first step I added the crystal rhinestones in the shape of 100, I bought these from Spotlight, not sure what the brand was.
The Prima patterned paper had a sheet of sticky letters at the back of the pad and I used these to spell TODAY.
On the second step, I added a Heartfelt diecut from the Timeless Amour die cut in white cardstock. I used a silver peel off onto the pink cardstock and matted in Silver Mirror card from my scraps.
The third step was quite lovely by itself so I just added the Hummingbird and one of the flower images.
I added a Kaisercraft Hanging Plaques wood piece, cut some of the spare cardstock to fill it and placed a silver Peel off inside it. I adhered this plaque to a piece of chipboard covered with silver mirror card stock and stuck inside the card to give it some strength.

Here is the back of the card. I used the Spellbinders Majestic labels twenty five to cut out the writing panel and the verse which I adapted from something I found on google. The little image was from a Kaisercraft Key to My Heart Collectables die cuts. I shaded the die when it was still on the cardstock with Angel Pink memento ink.

Please excuse the untidy background of my crafting table, I wanted to take a photo of the card standing, so you get an idea of the layers. Pretty huh?
..... and there you have it. The card was a pleasure to make - the hardest thing was getting the colour theme and once I had the Prima papers I was off!
Here are the main ingredients that I used to make this card:
 |  |  |  | |
 |  |  |  |  |
 |  |  |  |  |
 |  |  | ||
 |  |  |  |  |
 |  |
I hope you liked today's card - thanks again for stopping by


