Thanks for dropping by, I hope you have had a great day or are just beginning a great day!
I made a birthday card for our granddaughter before I left for my overseas trip, her birthday is on the 14th of October so my dearest husband Frits took it with him to pass along to her in my absence.
I can now show it to you as she has opened it already, here it is:

The colour of the card looks a little flat in the photo, in "real life" it looks a little brighter.
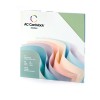
The checked card stock is from a Premium Edition Boho 12 x 12 paper pad and the card base is a sheet of Kaisercraft Burnt Orange weave card stock.
The Ribbon is from Really Reasonable Ribbon and the embellishments are from K & Co Tim Coffey Birthday Stickers.

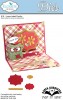
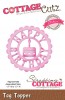
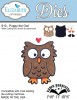
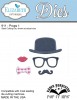
This is a Pop-Up card and I used the ECD/Karen Burniston Lorna Label die, Poppy the Owl, Props 1 die set, a Cottage Cuts Happy Birthday die and a tag die from the Spellbinders Filigree Delight die set.
I hand wrote Marley's name on the step of the Pop-Up card with the little heart that comes with Poppy.

Here's a close up of Poppy the Owl. A current favourite with Marley.

I really like this little die from Cottage Cuts, it was a perfect size for the label behind it.

I printed the sentiment on a piece of white card stock using my computer and then cut it out with the A2 Filigree Delight tag die from Spellbinders, I inked the edges with Vintage Photo distressed ink.

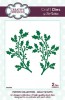
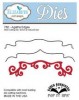
At the top and bottom of the card I added a little design using the ECD Agatha Edges die. I also cut the corners using a Crop-a-dile corner cutter.
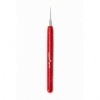
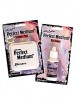
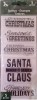
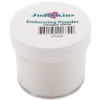
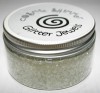
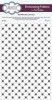
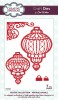
Here are the main ingredients I used to make this card:
I hope you kike today's card I know that Marley liked it. Stay well my blogging friends

I made a birthday card for our granddaughter before I left for my overseas trip, her birthday is on the 14th of October so my dearest husband Frits took it with him to pass along to her in my absence.
I can now show it to you as she has opened it already, here it is:
The colour of the card looks a little flat in the photo, in "real life" it looks a little brighter.
The checked card stock is from a Premium Edition Boho 12 x 12 paper pad and the card base is a sheet of Kaisercraft Burnt Orange weave card stock.
The Ribbon is from Really Reasonable Ribbon and the embellishments are from K & Co Tim Coffey Birthday Stickers.
This is a Pop-Up card and I used the ECD/Karen Burniston Lorna Label die, Poppy the Owl, Props 1 die set, a Cottage Cuts Happy Birthday die and a tag die from the Spellbinders Filigree Delight die set.
I hand wrote Marley's name on the step of the Pop-Up card with the little heart that comes with Poppy.
Here's a close up of Poppy the Owl. A current favourite with Marley.
I really like this little die from Cottage Cuts, it was a perfect size for the label behind it.
I printed the sentiment on a piece of white card stock using my computer and then cut it out with the A2 Filigree Delight tag die from Spellbinders, I inked the edges with Vintage Photo distressed ink.
At the top and bottom of the card I added a little design using the ECD Agatha Edges die. I also cut the corners using a Crop-a-dile corner cutter.
Here are the main ingredients I used to make this card:
 |  | |||
 |  |  |  |  |
I hope you kike today's card I know that Marley liked it. Stay well my blogging friends