Thursday, 6 August 2015

A Lilac and White Happy Birthday Card

Hello good people how're you doing?

I have a pretty little card to share with you today, I hope you like it too!

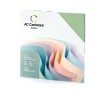
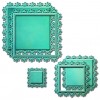
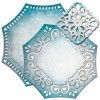
I began by making the base card in American Craft white cardstock. Then alternated the two colours of Lilac and White using the Spellbinders Triple Floral die (as the first matted layer) and the Labels 46 decorative elements, layering them on atop the other.


By lifting the flower petals on the die cut it created a little space that enabled a pearl to be added as the perfect thing to add to each flower.


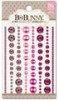
I layered the die cuts using foam tape to add dimension and at the corners placed Creative Expressions corner pearls (Love these!).  I also added a Bo Bunny Pink Rhinestone to each corner of the base card.


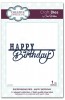
I embossed the Lilac centre first and then die cut the centre again in white card stock, the piece just dropped into place over the previously embossed space. The sentiment was a JustRite stamp that I layered with cardstock and foam pads.


On the inside of the card I kept it really simple by placing the Sue Wilson expressions die cut using the same Lilac colour used in the rest of the card.


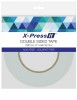
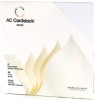
The main ingredients that I used to make this card were:
Thanks for stopping by and reading today's blog

Tuesday, 4 August 2015

Happy Birthday in Green

Hi, I hope you have had a great day. Today saw the break in the hot weather we have been having recently so temperatures have dropped significantly with the heating going on this evening to keep the chills away!

Today's card is a product of my weekend crafty times - here it is:


I cut a  11.5 x 5.75 inch piece of white American cardstock and folded it in half to create 5.75inch square card base. Then cut a green 5.5inch square as my next layer.


Using the largest of the Spellbinders Triple Floral die and some white cardstock I created the next layer adding foam tape between the two layers to add dimension. I also added a pearl to each corner as the little space there needs a little something.


The first layer in the central piece was the layer in Green created by using the largest Spellbinders Floral Assortment die.

I also cut two pieces from the Sue Wilson Lattice Arched Adornment die and when I placed them together on top of the floral assortment die they got a little lost - I needed something in white ... as it happened on my desk was the centre cut out left over when I was experimenting with the Spellbinders Blooming collection die ... and it worked. So I placed the white left over piece on top of the Green floral assortment layer, then the white card and then the two green Lattice Arched Adornment die cuts which I joined together.


For the centerpiece I used the round embossed die piece using the Spellbinders Blooming Collection adding this with foam squares to the top of the layers I had added previously.

Rather than use the circle cut out from this die, I used a 2 inch round punch to cut the size of the circle down so you could see some of the die cuts beneath.

I stamped the sentiment with the Just Rite Spring words stamped with a Black Tuxedo Memento ink pad. Then added a couple of Rhinestones I had in my stash.


Here are the main ingredients that I used to make this card:


Thanks for stopping by today and reading my blog, I hope you liked today's card

Monday, 3 August 2015

"Good Luck in your New Home" Card

I hope you are well and enjoying your start to the week. We are having unbelievable temperatures. No one has told the weather that it is winter - today we experienced 27 degrees!! We are keeping quiet as we know these kinds of temperatures will be short-lived.

Saturday 1st August we welcomed new neighbours into our road, just across from us. We walked across to say hello and drop in a card and a bottle of sparkling wine.

Here is the quick card I rustled up as a Welcome .....


I created the card base using a sheet of white American Craft cardstock. I cut a square of white card, inked the edges using a pink memento ink pad sticking it to the white card base. I used two tones of pink American Crafts cardstock and the largest Triple Floral Spellbinders to create the next layer of the card.


I laid the darker pink die cut first on the card base using foam tape to add dimension. Then I die cut the lighter pink to just create a frame using the two biggest dies from the spellbinders set, laying them slightly offset to give the impression of a shadow. I added a pearl at each of the four corners of the card.

I then cut a piece of white cardstock using the largest of the Spellbinders Floral assortment die and laid this on top of the two pink layers. Such a pretty die.


I drew the little image of the "Mushroom House" onto a piece of white cardstock and coloured it with my Copics. Once coloured I fussy cut it out, laying it with foam tape on top of a square of white cardstock which I had coloured with a pink memento ink pad around the edges.

I used the little oval from the Sue Wilson Innsbruck die and inked it again with pink memento ink and hand wrote a sentiment in its centre.


Opps I forgot to mention that I added some Really Reasonable Ribbon - white netting underneath all the layers and created a bow with it adding some thin ribbon from my stash at the side of the card.


Inside the card I added this sentiment which I sourced on Google and fussy cut it out.


The main ingredients that I used to make this card were:


Thanks for stopping by today to look at my card - I hope you like it ....
Related Posts Plugin for WordPress, Blogger...