
Firstly an admission by way of a question! Do you come across things in your stash that you put in a safe place because they are really nice and you don't want to use them yet, but you will, at some point? Well I do and I did. I'll explain .....
Before I do, I would like to show you one of my cards that belong to the family of Fairy Stamps that I had purchased ages ago. The first of the four I have already shown on an earlier blog post and I called her the "Dreamy Fairy"; this one I have called the "Playful Fairy". There are two more to show in this family of stamps and I will show you the cards I have made using them on my next few blog posts.
So here she is: The Playful Fairy

Apologies for the "wonky" picture. I will at some point get some help on how to take better pictures. In the meantime I just zap them using my i-phone!

I also got an idea from one of my recent blog hops about putting together a compilation of pictures into one image that shows parts of the card in closer detail. The next picture is my first attempt at trying that!
So how did I construct this card?
OK so here it is the admission!!!!!
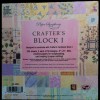
I was delighted to find in one of the tubs of paper stack papers a lovely set of 200, 6" x 6" papers that are gorgeous. The pack is from Provo Craft and are called Paper Symphony - Crafter's Block 1. Having "rediscovered them" I leapt straight onto the web and did a search for more (as you do!!) and noticed that others are seeking these papers too. They seem not to be available any more. I came across a Crafter's Block 2 however they were just coloured sheets, useful if that is what you are looking for! So I took a brave step and decided to use them!
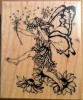
The stamp is from a set of four that I have from PSX stamps (Personal Stamps Exchange) I believe it and those others I have may be retired. This one is numbered G-3251.
I used Memento Rich Cocoa ink to stamp the image and coloured it in using a variety of Copics (putting into practice some newly learnt skills!).
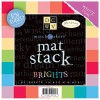
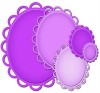
Using a piece of DCWV paper I cut out and embossed a backing layer for the image using Spellbinders Lacey Ovals (S4 - 314).
I made the side panel using a Fiskars border punch and then layered some of the scrap cut off's to make the ribbon effect on the strip. A few brads from my stash finished the strip off.
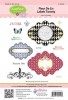
The sentiment is from JustRite Stampers "Fleur De Lis Labels Twenty" stamps and backed by silver mirri card cut with decorative scissors and mounted onto a scrap of design paper with foam pads.
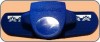
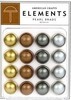
Lastly a little metal heart embellishment I bought at Spotlight (a GREAT store that also sells crafting supplies amongst other things like fabrics, homewares, linen etc).
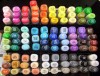
The main ingredients that I used to make this card:
Thanks for stopping by. I hope you like the card! I'd love to hear your feedback so pop a comment and I promise to get back to you in Thanks.


Great post. Thanks for sharing nice post with us.
ReplyDelete