Gracious it has been a while since I last added a post here. I hope you have been well in the meantime. Work has been pretty much full on for me, including a two week stint to Shanghai, China a first for me, and as it turned out, an amazing trip. The city is incredible and provides a home to 24 million people more than the entire population of Australia as a continent. It is a vibrant metropolis that is on the go 24/7.
I have a card to share with you today that I sent in thanks to a friend of mine in Kuala Lumpur in Malaysia.
Here it is:

This card was my version of the Karen Burniston (Designer and all round whizz with her Pop-it-up and other dies that she creates for ECD - Elizabeth Craft Designs) tutorial on how to use the ECD Butterfly Pivot die.
I used a MME 12 x 12 paper pad and DCWV Brights 12 x 12 card stock for the base colours for the card.
You can see I used a lovely pink gingham washi tape to add a bit of interest.

Here is the card opened fully - the one below is me holding it so you can see the triple feature that you can create using this die.
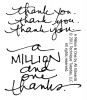
The stamp is from Technique Tuesday.

The centre butterfly fold very nicely when you close the card.

A view from the top looking down on the card so you can see more easily how the card all fits together.
Karen Burniston provides a great tutorial on finishing the card so that no space appears where the dies cut the card.

... and here is the back of the card.
Here are the main ingredients that I used to make this card:
Thanks for stopping by today, hope you like this card - why not leave me a comment and tell me what you think of it.

I have a card to share with you today that I sent in thanks to a friend of mine in Kuala Lumpur in Malaysia.
Here it is:
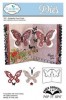
This card was my version of the Karen Burniston (Designer and all round whizz with her Pop-it-up and other dies that she creates for ECD - Elizabeth Craft Designs) tutorial on how to use the ECD Butterfly Pivot die.
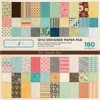
I used a MME 12 x 12 paper pad and DCWV Brights 12 x 12 card stock for the base colours for the card.
You can see I used a lovely pink gingham washi tape to add a bit of interest.
Here is the card opened fully - the one below is me holding it so you can see the triple feature that you can create using this die.
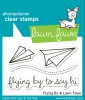
The stamp is from Technique Tuesday.
The centre butterfly fold very nicely when you close the card.
A view from the top looking down on the card so you can see more easily how the card all fits together.
Karen Burniston provides a great tutorial on finishing the card so that no space appears where the dies cut the card.
... and here is the back of the card.
Here are the main ingredients that I used to make this card:
 |  |  |  | |
 |  |  |  | |
Thanks for stopping by today, hope you like this card - why not leave me a comment and tell me what you think of it.