Wednesday, 15 July 2015

Happy Birthday (Purple stained glass window technique) card

Hello, my blogging family and friends. Can you believe it, two days in a row for me. As I mentioned yesterday I have a number of these "Stained Glass Window" type cards to show you and this is the second. There's an old saying about cooking for a family and that is cooking for a few more makes no difference. I think that worked with these cards, whilst I was glueing and glittering on one I might as well be doing a few more whilst I was at it!

So here's today's card:


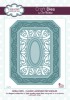
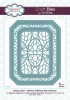
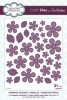
I used a piece of Kaisercraft Grape weave cardstock as the contrast to the white cardstock that I used to make this card. The die is another of Sue Wilson's (Creative Expressions) Noble collection Ornate pierced rectangles die. The embossing folder used is another Sue Wilson product from her range of A4 Embossing Folders - The "Checkboard" folder.


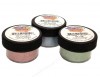
Using the central die of the set I cut out the medallion in white cardstock then adhered clear acetate behind it. Using the Art Institute glue and glitter (in Blackberry, Pale Pink and Gold) I tuned the medallion over and glittered behind the cut out shapes, as and when the glue dries the twinkly glitter shines through on the right side - it's fun to watch it gradually appear.


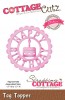
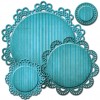
To make the sentiment, I used a Cottage Cutz die in the Grape coloured cardstock then backed it with the smallest of the Spellbinders Circle Delight die cut out using white cardstock.


The flowers I will admit are shop bought. I've had them for ages. I think it was at the Brisbane Expo a few years back.
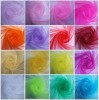
At the back of the flowers I used some gorgeous dark mauve Tulle. The leaves are the Spellbinders Spig dies also die cut using white card stock.


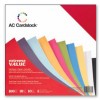
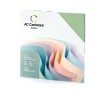
The main ingredients I used to make this card:


Thanks for stopping by to read today's post. I have a few more cards just like this one to show you. So more to come.

Tuesday, 14 July 2015

Happy Birthday (Red stained glass window technique card)

Hi again. I hope your day is or has gone well. We were delighted to have a visitor today. A friend we have known for about 12 years and Frits worked with on a large contract he had up in Coonabarabran - Mark Boyd. dropped by the house He happened to be in Bellingen on business and decided to come up the mountain, just a bit further to see us here in Dorrigo. It was lovely that he dropped in and we had a lovely reminisce over a cup of tea.

I mentioned in an earlier post that I had managed to make time to spend in my craft room over the weekend and today's card is one of the products of that time. Here is one of the cards:


This card was made using the stained glass window technique. Firstly you cut out your shape, in this case I used the Sue Wilson (Creative Expressions) Italian Collection Calabria die. Then I adhered a piece of clear acetate behind it. Turning the project over (acetate side up) I used the Art Institute glue and glitter in red, green and silver on the back which when dry shows through on the side of the acetate you see through the gaps in the die.


Although the glitters merged a little bit  I really like the effect. These glitters are really fine and they have such a fantastic twinkle.
I used a Spellbinders grand circle to cut a mat behind  the circle. I placed a pearl on top of the sentiment in the centre of the medallion.


I cut the frame in white cardstock using the Sue Wilson (Creative Expressions) Italian Collection Tuscany die, which I placed under the central medallion (I used foam mounting tape to raise the medallion). Dotting a few pearls around the outside, some white peel off in the corners and a thin white peel off line finished off the card.


Here are the main ingredients that I used to make this card:


Thanks for stopping by to read today's post. I made a few of these cards so I have a few to show you in the coming days.

Monday, 13 July 2015

A "Thank You" card

Hello, I hope you are well, wherever you might be on the globe of ours! The weather here in Dorrigo is beautiful during the day but VERY chilly in the evenings. So winter is making herself felt. We did manage some time in the garden over the weekend doing stuff which was log overdue.

Today I have a Thank you card to show you. It is one I made for family in Holland.


Here is the front of the card, I must say it was pretty easy to make as I just created the layers from the dies of this Creative Expressions - Sue Wilson Noble Collection die - Ornate Pierced Rectangles. All the dies I have listed below in the ingredients list.


I used the Creative Expressions - Sue Wilson - Expressions collection die to create the centerpiece of the card in white card stock. It's lovely.


I made these flowers - keeping them reasonably flat as the card had to go through international post. I really like the Tulle and hemp twine as accessories.


Here are the main ingredients that I used to make my card:


I really appreciate you stopping by to read my post, I have been doing some crafty-play time over the weekend and I have some lovely cards to show you once I photograph them for you.

Sunday, 28 June 2015

2 Tri-fold Birthday Cards

Hello my blogging family and friends, I hope you are well. My my how time has F-L-O-W-N where does it go, I think there must be a TIME BANDIT who sneaks up unawares and takes a few minutes here and a few minutes there!

I have been in my craft room pottering, I have created a Laura Denison model - I'll show you when I have some photos - it has come out really well. A surprise for another time.

Today I have two cards that are both tri-fold cards to show you, here's:

CARD 1


Here is the front of my card when it is all folded together.

All the papers are from Echo Park - Sunshine Collection.


Here is the card opened up, I really like this style of card, once the cut and scoring is done, then the panels fold.


Here is a "helicopter" view of the opened card.


I just  love these wooden buttons - I have been holding onto them for a while 'cos I love them so much, then I thought this was crazy and that I should use them - so here they are - with a little black hemp string creating a bow on top.


Here is the central medallion made with scraps of card stock but using the Spellbinders Circle Delight dies.


CARD 2


Here's the front of my second card.
The papers are American Craft - Lucky charm collection.


Here is the card opened up, I cut out little butterflies from the reverse of the Echo Park papers to add as embellishments on this card.


Here is the second medallion, the central die is from Cottage Cutz.


The main ingredients that I used to make these cards:


So there you have it, two cards made using the tri-fold technique ..... Thanks for stopping by to read today's post ...

Related Posts Plugin for WordPress, Blogger...