
Hello my Blogging Friends and Family. It seems March is a key birthday month in our family we have about 5 birthdays to celebrate and today's card for little Emelia (my Niece) in Germany is no exception.
Today's card is currently in the post winging its way over to Germany, so I thought I'd share it with you. It is my first BENDI card and I was very inspired by a version of this card on Pinterest and all the instructions were on Splitcoaststampers. CLICK HERE.
Here it is:

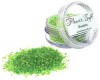
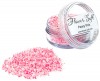
It's the first time I have used Flower soft too and it makes the blossom on the trees look very realistic I think.
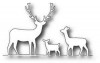
The grass die is from Cottage Cutz as is the Trio of Deer - in fact I think most of the dies I used to make this card are either Cottage Cutz or Memory Box dies!
I took a few pictures, WARNING this blog is a bit photo heavy.

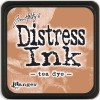
Close up of the Deer - I dotted them using a white Signo, uni-ball broad nibbed pen. I used a Swiss Dots embossing folder and inked it with an Old Tea distress ink pad. The little birds (Resting Birds) were cut from scraps of paper from my stash and I tucked one of them up into the tree.

Here's the card in side view so you can see how each of the "Arms" on each side of the card are overlapping so that it stands.

This photo looks down on the card and again you can see the structure of the BENDI card a little better.

When you open up the side "Arms" you get to see inside the card - its quite interactive and gives a nice 3D effect. You can see on of the trees on the main inner panel this is the Grand Oak Tree by memory Box and you can just see the swing too.

Here is the inside main panel. You cannot see the clouds to well, I used a Sizzix stamp set (Welcome Home stamp and die set) and used a Memento Pale Blue ink Pad. The bike is also a Memory Box die too.

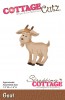
I just loved the little goat. I made a fence using little lolly sticks and also punched out some leaves to look like bushes under the second tree using pieces of cardstock from my stash. Great way to use up your spare bits and bobs. Isn't the little goat cute? I used a couple of brown/earth coloured Copic markers to give him some definition.

So here is the card opened out fully - it stands well on its own as you train the sides to remain curved.
Pretty huh?
Here are the main ingredients that I used to make this card:
Well, there it all is. I hope you like the card. It's quite easy to put together once you have the gist. The instructions on Splitcoaststampers are Great!

Today's card is currently in the post winging its way over to Germany, so I thought I'd share it with you. It is my first BENDI card and I was very inspired by a version of this card on Pinterest and all the instructions were on Splitcoaststampers. CLICK HERE.
Here it is:

It's the first time I have used Flower soft too and it makes the blossom on the trees look very realistic I think.
The grass die is from Cottage Cutz as is the Trio of Deer - in fact I think most of the dies I used to make this card are either Cottage Cutz or Memory Box dies!
I took a few pictures, WARNING this blog is a bit photo heavy.

Close up of the Deer - I dotted them using a white Signo, uni-ball broad nibbed pen. I used a Swiss Dots embossing folder and inked it with an Old Tea distress ink pad. The little birds (Resting Birds) were cut from scraps of paper from my stash and I tucked one of them up into the tree.

Here's the card in side view so you can see how each of the "Arms" on each side of the card are overlapping so that it stands.

This photo looks down on the card and again you can see the structure of the BENDI card a little better.

When you open up the side "Arms" you get to see inside the card - its quite interactive and gives a nice 3D effect. You can see on of the trees on the main inner panel this is the Grand Oak Tree by memory Box and you can just see the swing too.

Here is the inside main panel. You cannot see the clouds to well, I used a Sizzix stamp set (Welcome Home stamp and die set) and used a Memento Pale Blue ink Pad. The bike is also a Memory Box die too.

I just loved the little goat. I made a fence using little lolly sticks and also punched out some leaves to look like bushes under the second tree using pieces of cardstock from my stash. Great way to use up your spare bits and bobs. Isn't the little goat cute? I used a couple of brown/earth coloured Copic markers to give him some definition.

So here is the card opened out fully - it stands well on its own as you train the sides to remain curved.
Pretty huh?
Here are the main ingredients that I used to make this card:
 |  |  |  | |
 |  |  |  |  |
 |  |  |
Well, there it all is. I hope you like the card. It's quite easy to put together once you have the gist. The instructions on Splitcoaststampers are Great!
this card is amazing Sally-Ann. i love everything about it. it is truly a work of art. i don't have some of those dies but am sure i have some similar to give it a try. thanks so much for sharing your work and encouraging inspiration. split coast stamper tutorials are easy to follow. cheers.
ReplyDeleteThank you Pearl. I cannot say it was an original idea. The idea came from someone else and then I used the dies that I had to make the card my own. So glad you will try this one too. The instructions are clear on Splitcoaststampers so give it a go, I am sure you won't be disappointed.
Delete