Saturday, 4 October 2014

A Coffee Mug House Christmas Card

Hello Blogheads, how are you today? I have been busy in my Craft room today and made a few cards that I can share with you over the next few days. I am trying to make time crafting as I am working overseas for about 10 days leaving here next Monday 13th on a business trip to Las Vegas. Yes it is a business trip, I have a colleague who works there ans we have a client joining us for a meeting.
Fortunately we have a long weekend here in New South Wales meaning Monday is a holiday ... yay more crafting time!

Here is today's card:


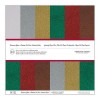
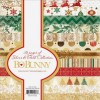
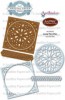
I just loved the Cottage Cutz die when I saw it and it makes a lovely card. I made another one which I'll be showing you too at some point. The Background paper is from a Bo Bunny Christmas 6 x 6 paper card collection, the gold mat card is from an American Crafts metallic glitter 12 x 12 Paper Collection. I used a Spellbinders Floral Oval die and LOTS of scraps to make the little Coffee House!


Here's the coffee house in close up so you can see it better. I was pretty true to the original image on the packaging, adding a B0000 copic to give the snow a little dimension and again using W1 & W3 Copics for shadowing.


I used a Ribbon I have had in my stash for ages which I think I bought from the Frantic Stamper in the states. I bought lots so it lasts ages!
I placed it under the Oval centre piece and added a bow on top at the side.


Mmm the Vanilla Kaisercraft weave card stock turned Blue in the light when I took this photo no idea why!!! I just took this to show I used a piece of Mirror card, punched a few stars and popped a peel-off on top.


... and there you have it!


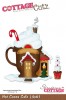
Here are the main ingredients I used to make this card:


Thank you for stopping by today, I hope you liked my card

Thursday, 2 October 2014

A Log Cabin Christmas Card

Hello my lovely blogging family and friends. How did the second day of October pass for you? I hope it was a great day. I somehow missed a day as I thought today was a Wednesday and when I discovered tomorrow was Friday it was kind of weird! The big plus was realising this is a long weekend with Monday being a Labour Day holiday. Woohoo!

Today's card is similar but slightly different from the one I shared with you yesterday.
Here it is:


As you can see what makes the cards so similar is the Spellbinders "Branching Out" die which I cut out from Kaisercraft scarlet weave card stock and also used a Basics A die (#4) with White card stock inked with vintage photo inked pad on top of it. These layers, I then placed on top of a card cut from white card stock.


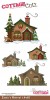
Here's a close up view of the Cottage Cutz die that I put together for the front of this card. Like yesterday's card it took time to do but it is so adorable. Isn't the deer cute! I used W1 & W3 copic markers to add dimension as well as white paint and Stickles Crystal glitter. The trees were cut from an Impression Obsession Fir trees die.


With this die you can create many different looks, I chose however to use the suggestion made on the front of the packet this time. It helped me understand how it could be used in different ways when i use it again.


The sentiment was made in the same way as yesterday's card. A JustRile stamp, cut out with a Spellbinders die and edges inked wit Vintage photo and Stickles Crystal Glitter added.


These are the main ingredients used to make this card:


Thanks for stopping by again today. I hope you like today's card.

Wednesday, 1 October 2014

A Christmas Candy Mill card

Hello how are you? How's your day going?
Work has been hectic for me but in the evenings I love sitting whilst the News is on and posting a new card that I have made on my blog.

Here it is:


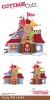
This card has at the centre a Candy Mill made with a Cottage Cutz die. It was fiddly but I think so worth it. Again I sat whilst watching TV and cut all the bits and pieces out of scraps then put them together for the centre piece of my card. I also used an Impression Obsession die to cut out the fir trees again using scrap pieces of card stock. The frame is a Spellbinders Branching out die cut from Kaisercraft Scarlet weave card stock and I used a Basics A (5 x 7) #4 die to cut the mat behind the image from white card stock which I then inked the edges of with a Vintage Photo ink pad.


Here's a close up of the Candy Mill. I added some Stickles Crystal glitter and some white paint to add the dimension and appearance of glistening snow. I also used a W1 & W3 Copic marker to create the effect of shadow on the building.


Here's a closer image of the front of the card.


The sentiment is from a JustRite stamp cut out with a Spellbinders Die, inking with Vintage Photo ink and some Stickles Crystal glitter.


Here are the main ingredients used to make this card:


Thanks for stopping by - enjoy the first day of October

Tuesday, 30 September 2014

Santa's Sleigh Christmas Card

Hello my blogging family and friends I hope I find you well. It is the 30th September today - where has this month gone? No scratch that, where has this year gone? Someone said to me that it was 8 weeks until Christmas - no wonder lots of us are making Christmas cards - I just thought I was being organised. It turns out I need to be making cards if I am to get them done in time to post!!

So here's another one. This time it shows how I have been playing with my Cottage Cuts dies.


I used white card stock for the base of my card and used a piece of Bo Bunny's Gold and Silver 6 x 6 paper pad. Then using Kaisercraft Scarlet weave card stock I cut out the square mat using a JustRite lace tiers die.


For the next layer I used white card stock and a Spellbinders splendid Circles die which once cut out I inked the edges with a Vintage Photo ink pad.
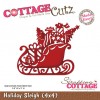
For Santa's Sleigh I used Scarlet cardstock again and a Cottage Cutz die. I then also die cut the image out with some gold card stock and then cut bits and pieces from the gold and stuck it onto the red layer.


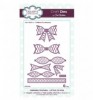
At the bottom of the card I added a strip of Polka Dot ribbon which I bought from Spotlight. Then I added a couple of bows made with Sue Wilson's lattice die then placed a pearl on top of the bows and at the corners of the card.


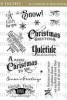
I kept the inside of the card very plain and just added a simple sentiment using a Waltingmouse stamp and cut it out using a Justrite die then inked the edges with a Vintage Photo ink pad.
...and there we have it.

The main ingredients I used to make this card:



Thanks for dropping by today to read my post - I hope you liked this card. I have a few more to show you using my new (to me) Cottage Cutz dies
Related Posts Plugin for WordPress, Blogger...