Friday, 22 March 2013

Another Vertical Mini Album B & W

Hi there. I hope you are well, we are experiencing changeable weather here today; I can just hear the rumble of thunder in the background as I catch up with this post for you!

I made another Vertical Mini Album; this time using Black & White as a theme and I thought you may like to see it. No video this time, just the photos.  I used exactly the same measures and dimensions as last time except I didn't have enough Toilet Roll holders ready to go, so I used a breakfast cereal box as a substitute, to make  the "tubes" needed for the pockets.


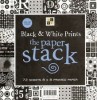
This time I used DCWV Black and White 6 x 6 Paper stack (one of my favourites!)

Kaisercraft Black Rhinestones and a Gingham Ribbon (bought at Spotlight).


A better view of the ribbon and Rhinestones, this time I added them to the Flap rather than the top of the album for a change.


Here are the covered "tubes" that became the pockets inside the mini album.


This time I made all the Tags the same. I hand cut the black card stock base by hand to fit, likewise the white card stock which I coloured the edges with using an Antique Linen ink pad. All stuck together with DST (Double Sided Tape).

I used the same ribbon as is on the front of the Album so it matches and a Martha Stewart Fan punch was used to decorate the tops and a pearl to finish.


Here's the back of the Mini Album opened out so you can see it a little better.


...... and the inside opened up just so you can see the papers I used to decorate the inside covers of the Album.


The main Ingredients I used to make this Mini Album:


Thanks for stopping by again to view my Blog - it's Made in Dorrigo Day tomorrow so I'll take some pictures and let you know how it went.

Monday, 18 March 2013

Vertical TP Mini Album

Hi, how are you? I haven't posted for a while as I have been preparing for my stall at the up and coming Made in Dorrigo Day, next Saturday March 23rd. Needless to say I now have a view posts to share with you that show the results of some of my labours! Today is no exception.

I have something a little different to share with you today. It is a Mini Album - with a little secret.
All will be revealed!! There are a few photos, a video, some links as to where I got my own inspiration and of course my ingredients list. So ... go grab a cup of your favourite beverage and settle in for a few minutes R & R.

This is it. The front of the Mini Album. I used Kaisercraft Sweet Treats 12 x 12 Paper Pack for the entire album.

The Dark Pink Gingham Ribbon is from Really Reasonable Ribbon.

The Tutorial to make this is shown in the You Tube Links near the end of my post. Ginger from Mt Sisters Scrapper gives great instructions.


The reverse side of the Mini Album.


The Mini Album opened up fully. I used a little Carl punch to create the covers for the holes in the top where the ribbon loops through.


The First of six pockets.


The second of six pockets - some of these images are better than others!

I used the same Gingham - 5/8ths width as I did on the top of the album. The Lime green card stock is from DCWV and the Spellbinders Die is one of the smallest dies in the Fleur De Lis Squares S4-318 series.

The pretty little scallop is from the Sweet Treats paper which I fussy cut out, punched the holes and cut out the little heart shape to reveal the cardstock behind.


Yes  you've guessed it, this is the third of the six.
I used Spellbinders Floral Doily Accents S5-040 to make the centre piece again using DCWV card stock.


Pocket number Four. Decorated very similarly as pocket two.


Pocket number Five. Decorated very similarly as pocket three.


Lastly pocket six decorated similarly to pocket two and four. For some reason my editing program changed the lovely pink heart to a black one - no idea why!!


Inside each of the pockets are Tags.
I used a variety of Spellbinders Dies including Floral Ovals, Lacey Rectangles, Floral Doily accents and
Lace Doily accents S5-062.

Some ribbon and lace from my stash finished them off. On the reverse I cut more white blanks and inked the edges with an Antique Linen Distress ink pad.


This is the side view and I wanted to point out the use of Basic Grey's Magnetic closures these are a fabulous way of closing this little album.

Here is my Video Clip of this Mini Album - BTW - the secret is that the pockets are made from Toilet Paper Rolls - hence why it is called a "Vertical TP Mini Album" great way to re-cycle huh!


Here are the links to Ginger's Fabulous Tutorials. There are Three in total.


Part 1: This shows you how to make the pockets and how to create the frame of the album using chip board

CLICK HERE
Part 2: This clip shows you how to add your pockets to the album (using a great hinge idea from Laura Denison at Following the Paper Trail) as well as how to finish your project.

CLICK HERE
Ginger shows a quick review of her finished project


The main ingredients I used to make this project:


Thanks for stopping by today. Hope you have a great week ahead.

Wednesday, 27 February 2013

In Loving Memory Cards

Thanks for dropping by today. I hope all is well with you and yours. It is STILL raining here, although not as heavy and more sporadically! I keep saying to myself that it's good for the flowers and also good for the water dams - that's if the infrastructure is enabled to capture all this water and not let it run out to the sea!

As people we enjoy the up and downs of Life's events and the emotions that become engaged as we experience the impact of these events whether we perceive them to be good or bad. Sometimes they are sad, particularly when we lose a friend or family member. Just recently I was asked to make Two cards in memory of a friend who had passed on. It is these cards that I have to show you today.


This is the more traditional Sympathy card of the two I am showing you today.


I used HOTP Design Papers and the following Spellbinders Dies:
- Basic Lattice S5-151
- Romantic Rectan' S5-090
- Crosses Two S5-093
- Foliage S4-328
- Venetian Accents S5-118


The white flowers are from Petaloo and the stamp on the tag is from the Flourishes set called Calla Lillies.


A closer view of the Decoupage medallion feature at the centre of the card. I stencilled one of the Crosses Dies with a Tim Holtz Ranger stain called Peeled Paint and then added a light green Rhinestone gem on the very top.


The second card is less formal. I was asked to use bright cheerful colours - hence the yellow Design Paper from (I think) Cosmo Cricket.

To match the Design Paper I also used a Memento Cantaloupe ink pad to stencil some colour to the Spellbinders Resplendent Rectangle die. On the sides I added pearls.

Lace from my stash was woven with a piece of ribbon also from my stash.


The central image was stamped using Memento Black ink and the Lilies are from the Flourishes "Calla Lilies" stamp set and coloured with Copic pens.

I cut the image from White Neenah Solar card stock using a Spellbinders LG Oval Die and layered it with a Spellbinders Floral Ovals die cut using Kaisercraft Liquorice weave card stock.


The person being remembered was a keen wearer of Thongs (Flip Flops was what I called them when I was in the UK) so I thought it appropriate to add this little charm onto this card using a Tim Holtz idea-ology Trinket Pin.


I stamped the sentiment onto the tag using Memento "Bamboo leaves" ink.
The die is from the Spellbinders Fancy Framed Tags One S4-377.


This was the sentiment i used inside the card.
I again used the Flourishes Calla Lilies set, Black Tuxedo ink, white Neenah solar card stock and cut it out with  a Spellbinders Label sixteen die S4-301.


Here are the main ingredients that I used to make these two cards:


Thanks again for stopping by, have a great day and ....

Related Posts Plugin for WordPress, Blogger...