Sunday, 22 June 2014

Happy 12th Birthday Harrison

Hello again my blogging friends and family.
Today I wish to show you my Grandson's 12th Birthday card. His birthday is on the 20th June and unfortunately we couldn't be with him on the day, however we did manage some time with him, a couple of days before, when I gave him his card from his Opa and me!

Harrison ADORES Minecraft, an on-line game that he plays with his friends. This was my inspiration for his card. I had to ring Tiffany to check the correct name of the game!!!

I took two photos - Here's his card:


I downloaded the image from Google as well as a Font you can download for free.
I then used Shimmer Sheetz from Elizabeth Craft Designs, embossing them with a couple of Sizzix embossing folders.

Here is an image of the inside of his card:

I used the image of the hand from Google which was one of the "World's" someone had created in Minecraft. I created a little "Pop-Up" device so that when you open the card the hand moves outwards.

The piece of Shimmer Sheetz at the side is a pocket into which we popped some money for Harrison to spend. I suspect you know what he'll spend it on!!!.

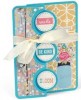
The few ingredients I used to make this card:


Thanks for stopping by to read today's post

Saturday, 21 June 2014

A Wedding Card for Tegan and Robert

Hello my blogging friends. How has your week been? I have been on my travels and once again glad to have spent a little time in my crafting space. For my post today I am sharing a Wedding Card that I was commissioned to make for a Tegan and Robert. I was requested to make a big wedding card in a box.
OK. So here are some photos of what I made:


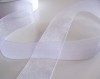
Let's begin with the box. I made this of kraft coloured Chipboard and covered it with some beautiful Cristina Re Oriental Rose wedding paper I found at Office Works, then added an organza 7/8 inch white ribbon on the outside which I purchased from Really Reasonable Ribbon


When you remove the lid you see a box lining made of crepe paper.


To keep the top flap of the box lining in place I added a flower, a couple of leaves and three pearls.


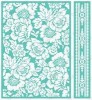
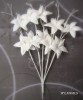
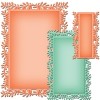
Here is the front of the card. I decided to make a middle step card. I used a silver paper to mat the panels and the panels themselves I embossed using a  Cuttlebug Anna Griffin Poppy Border set 5" x 7". On top of the panels I added some Want2scrap swirls (6074) pearls in white, with some stemmed star flowers I purchased from My2 angels. I added some 3mm white pearls at each corner of the panels.

The T and R initials I die cut with an alphabet die set and the sentiments are from a silver wedding peel-off.


Here s the card out of the box standing on its side and shows how the step card stands.


... and here is the card photographed on its side again it gives you a view of the step features.


Last image is of the back of the card. I added a writing panel, a little wired white butterfly and a stamped sentiment in silver encore ink which I die cut using a small circle spellbinders die.


The main ingredients I used to make this card:


Thanks for stopping by to read today's post. Have a super weekend

Thursday, 12 June 2014

A triple square flip card

Hello my blogging family and friends I hope I find you well today and enjoying what remains of a Great week. I have been away from my crafting space which I do miss being away from after a few days, however work prevails and all there goes well.
The card I am showing you today is the third in theTriple mini-series I have shown so far.

Here is my card:


This is a lovely card very similar to the two previous ones I have made. It uses similar ingredients just using them in a different way with different embellishments.


I used little scraps of matching dark pinkish cardstock to make the slim strips shown on the inside of the card which you see when the card is open.


The main ingredients that I used to make this card are:


Thanks for stopping by and taking a look at my blog today.

Monday, 9 June 2014

A Triple Fancy Frame flip card

Hello my blogging friends I hope I find you well. Today has been a bank holiday here in Australia for the Queen's Birthday Celebrations. For me this meant some time to play in my craft room.
The card I have to show today is one I made a little while ago and follows my earlier posting. It is another triple flip card.

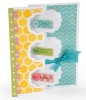
Here it is:


I really like this little flip card.
The little Daisies make it look so fresh.
They are little wooden buttons that I have had for ages and they just seemed to fit on this card.

I used Mimosa Yellow seam binding as it matched the card colours perfectly.

In my stash I had a piece of blue design paper which I cut with the die set piece and then added white pearls in top.


Here is the inside of the card when it flips open.
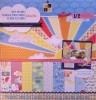
The card stock is all from the 12 x 12 DCWV The Sky's the limit paper pad.
I used a couple of peel offs for the sentiments on the front and on the inside of the card.


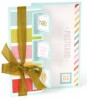
These are really pretty and the dies make it an easy card to put together. Here are the main ingredients I used to make this card:


Thanks for stopping by today have a great week

Tuesday, 20 May 2014

A triple circle flip card

Hi my blogging family and friends, how are you? I hope the start of your week is going really well.I have been experimenting with some of the Sizzix triple cut flip dies.
The card I have made and am showing you today is the triple circle flip card. They are a dream to use, as the biggest choice is really the papers you want to use and the colour scheme.

Here it is:


I used a DCWV Sky's the limit 12 x 12 paper pad pack so all my papers coordinated and it such a great pack of papers. The card base is Quill white cardstock 210gsm.
I added a few buttons that I had n my stash; I just loved the little hat buttons - I think I bought those at the Sydney Lincraft store. The little butterflies were in a pack of mixed buttons that I have had for ages.
The seam binding is called Peacock from Really Reasonable ribbon I stuck this to the card using 1/2 inch double sided tape.


Here is the card opened so you can see the flip effect. I used peel off's for the sentiments on the front and inside the card. So very quick, a lot of fun and the card looks really nice too!

Here are the main ingredients that I used to make this card:


Thanks for stopping by to read my blog today, I hope the rest of your week is Fantastic

Sunday, 18 May 2014

A 4 panel ECD Circle Accordion Card

Hi, How are you? Thanks for dropping in to read my blog.
I hope you have had a great weekend.
I have continued to play with my new Elizabeth Craft Design dies and today's card is made using the Circle Accordion die as well as one of their peel offs. I used the technique of adding glitter to the peel off and then coloring the image using my Copic markers. It's a great technique and they have tutorials on their YouTube site on how to do it.

Here's my card:

The base was made using white card stock (210gsm - so nice and firm). I cut the main frame using the ECD circle accordion die. Then using the circle edges I cut out 4 sections for each page using a Kaisercraft Gelato paper pad.


I used the ECD Happy Birthday die for the sentiment cut out in black cardstock.

I then used ECD warm diamond microfine glitter with a peel off which I polished onto double sided adhesive sheets and coloured with Copic markers.


Here is the second panel of the card.
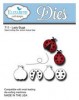
I added one of the Lady Bug dies - also from ECD - can you tell I am a fan of their products???


This is the third panel of my card. I used a Spellbinders circle die, a JustRite Stamp, a Black Tuxedo Memento ink pad and a very pale RV Copic Marker.
I also used the ECD Bees die too!


.. and here is the last panel of my card.


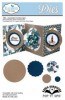
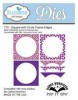
The main ingredients that I used to make my card are:


Thanks for stopping by and reading my Blog today, I hope you have a great week
Related Posts Plugin for WordPress, Blogger...